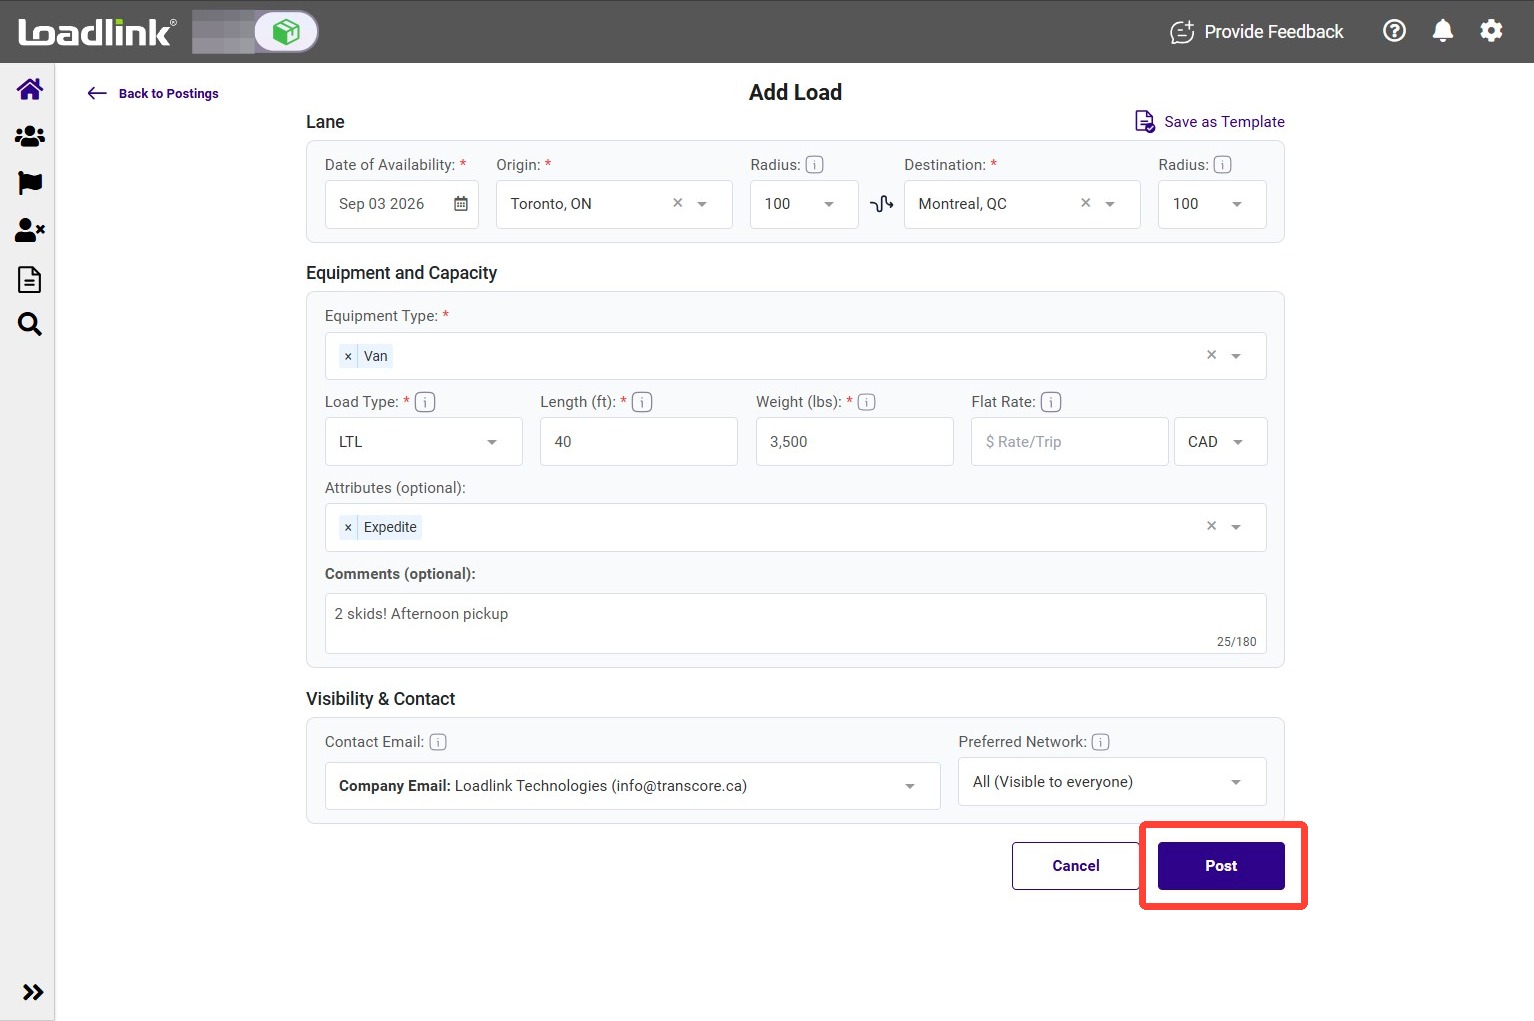
Create a load posting with your route, availability date, and equipment requirements. This guide also explains how to add shipment details, choose your contact email, and control who can view your posting.
Start a load posting
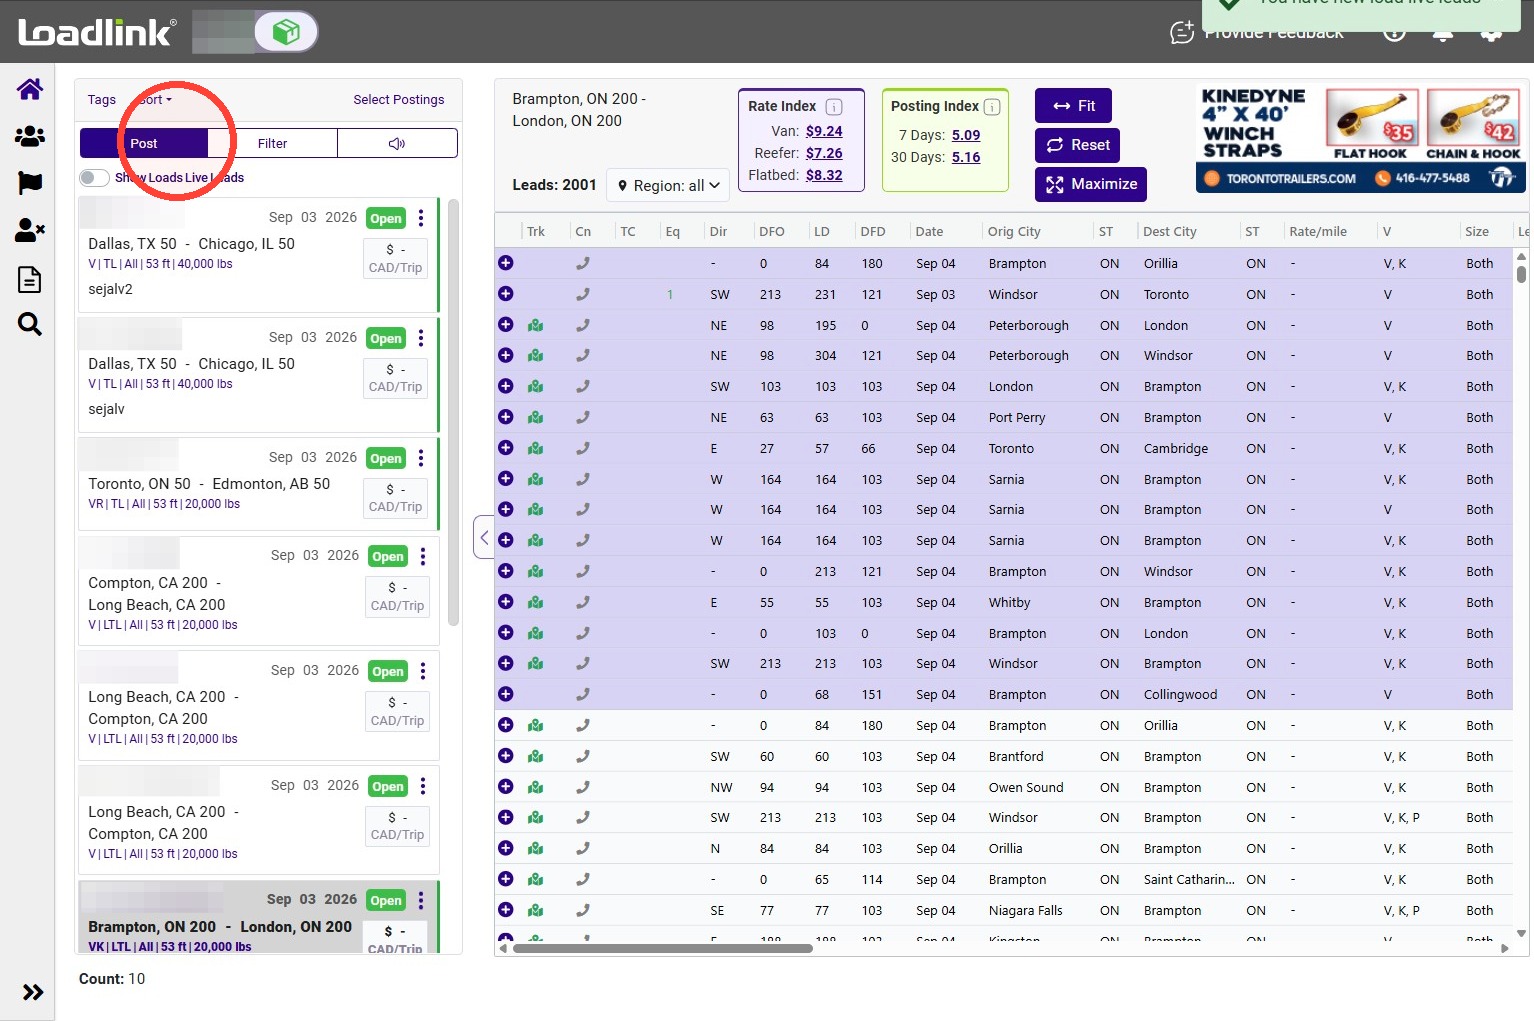
Click Post on the left side of the Postings panel.
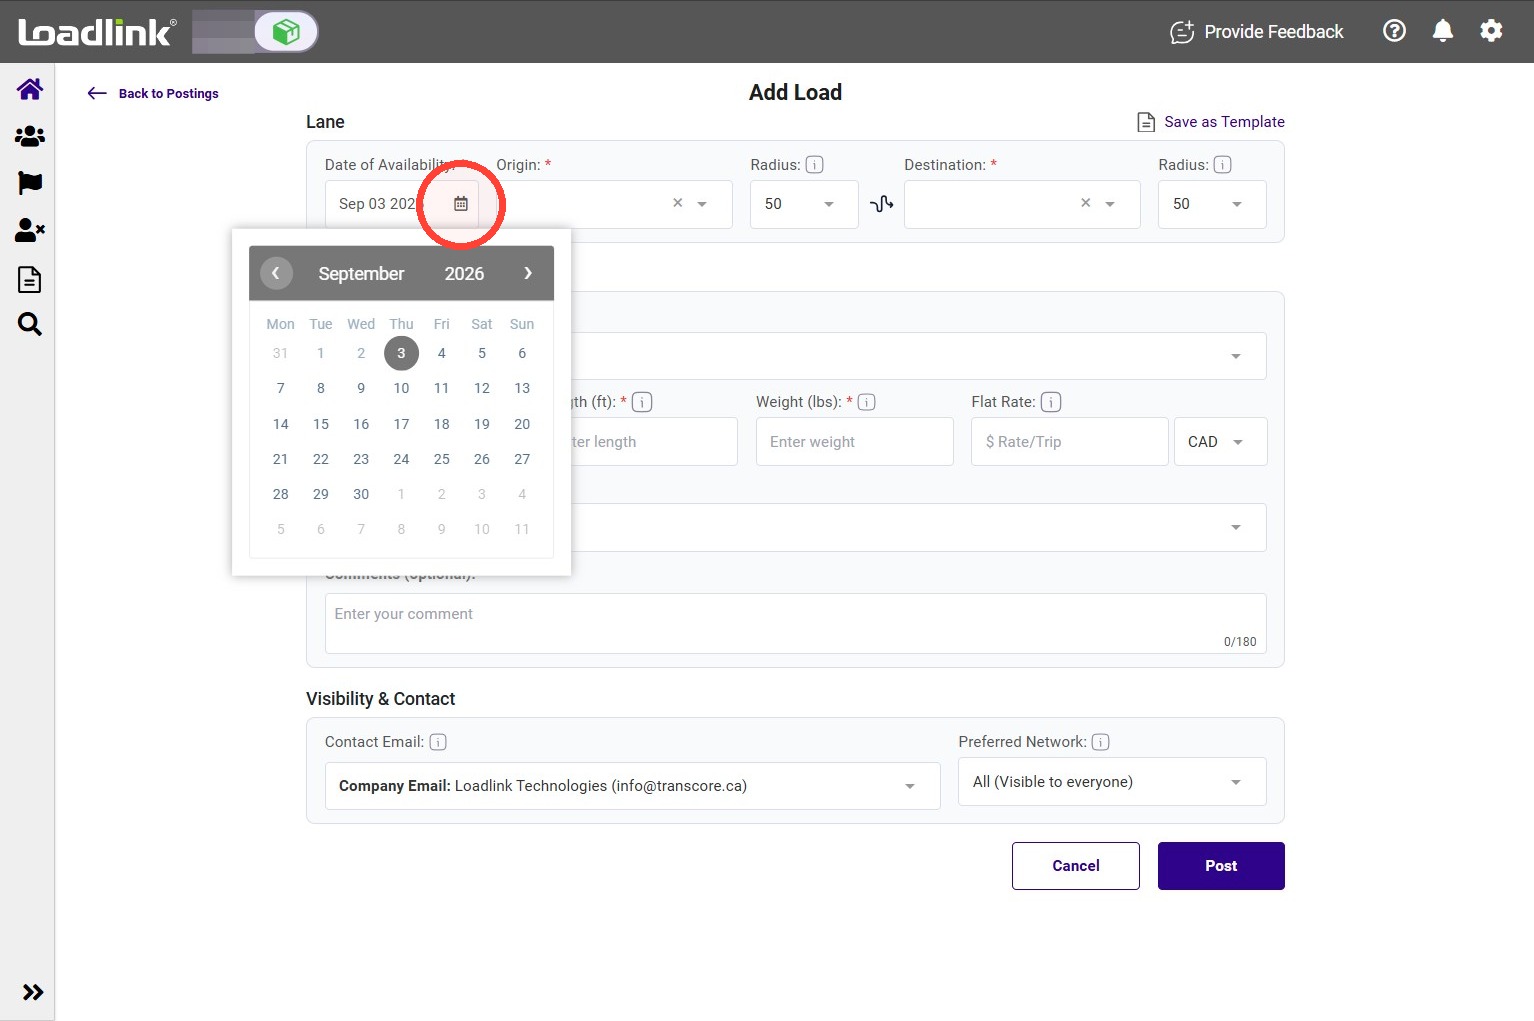
Set the pickup date
Open the calendar and select the date your load will be available.
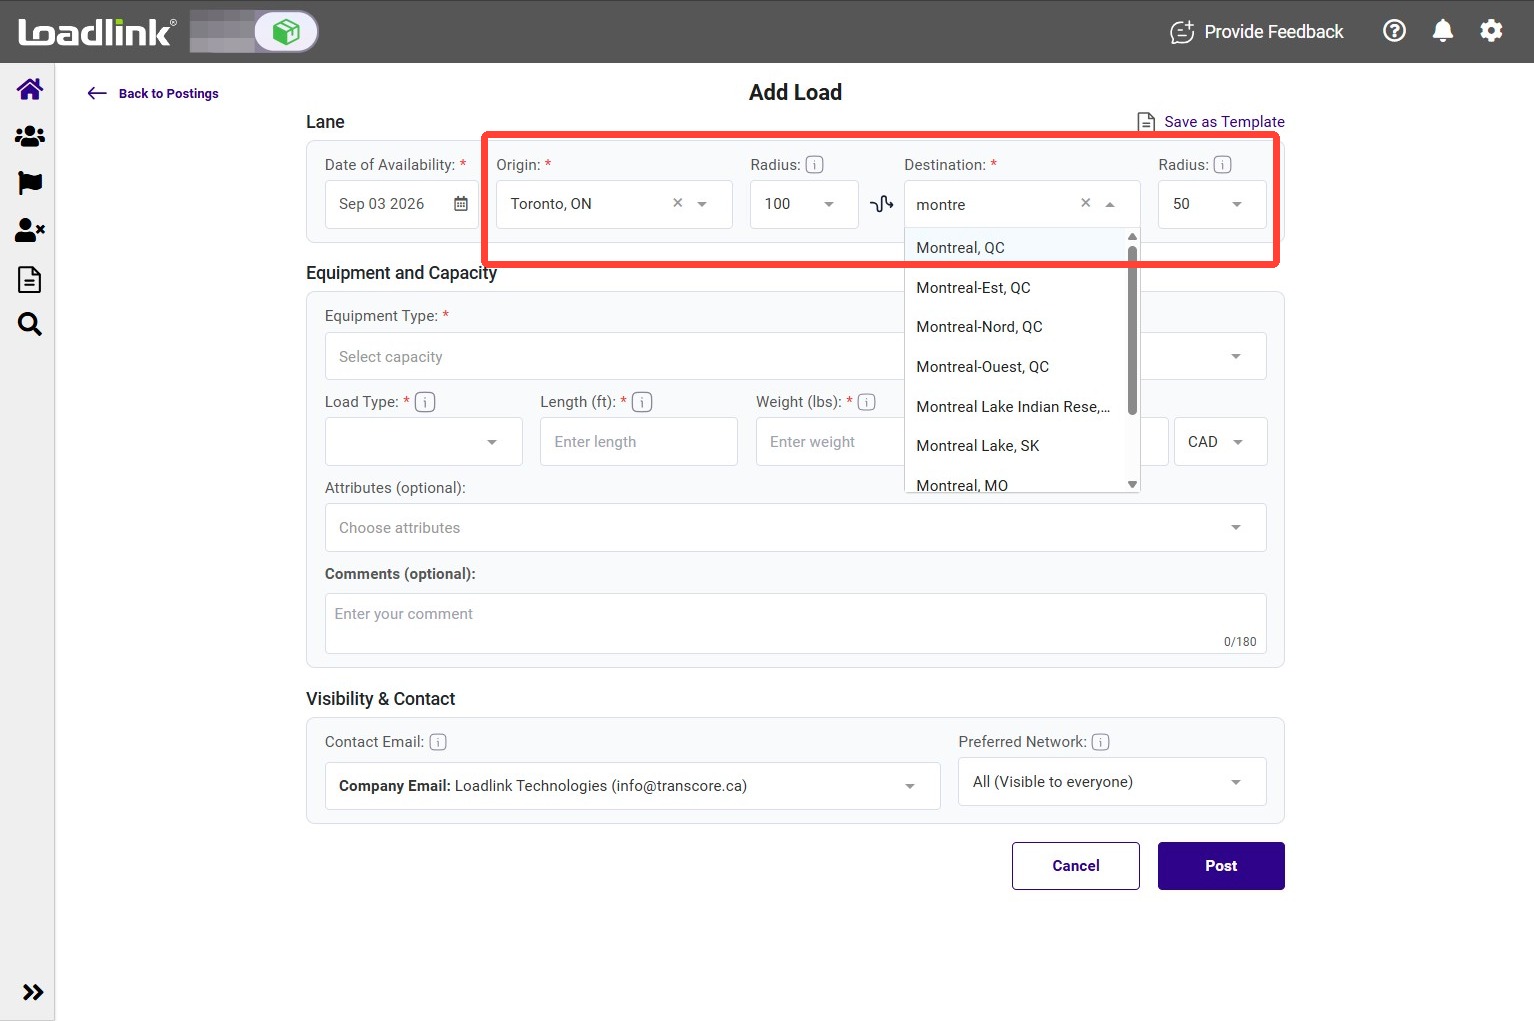
Enter your route
Select your pickup location under Origin and delivery location under Destination.
Adjust the radius to control carrier matching. A larger radius includes carriers across a wider area; a smaller radius focuses on carriers closer to your selected locations.
Tip!
If your city is missing, select a nearby city and specify the exact location in the comments.
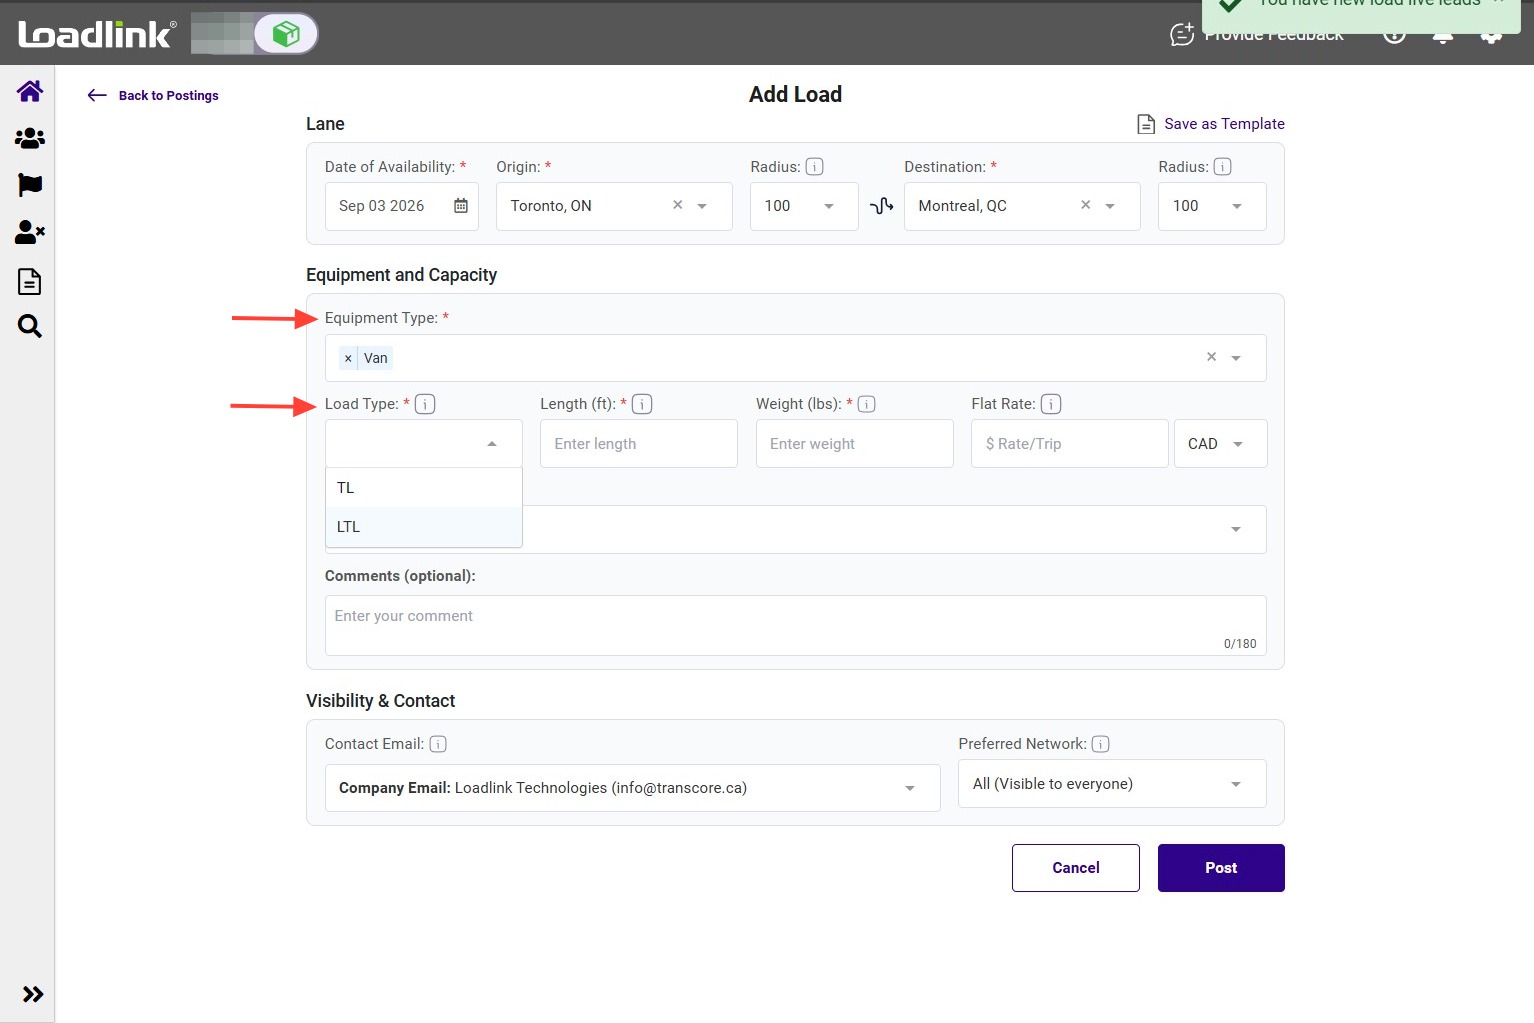
Choose equipment and load size
Select all equipment types suitable for your load, then choose:
– TL (truckload): Requires a full truck.
– LTL (less-than-truckload): Requires part of a truck’s capacity.
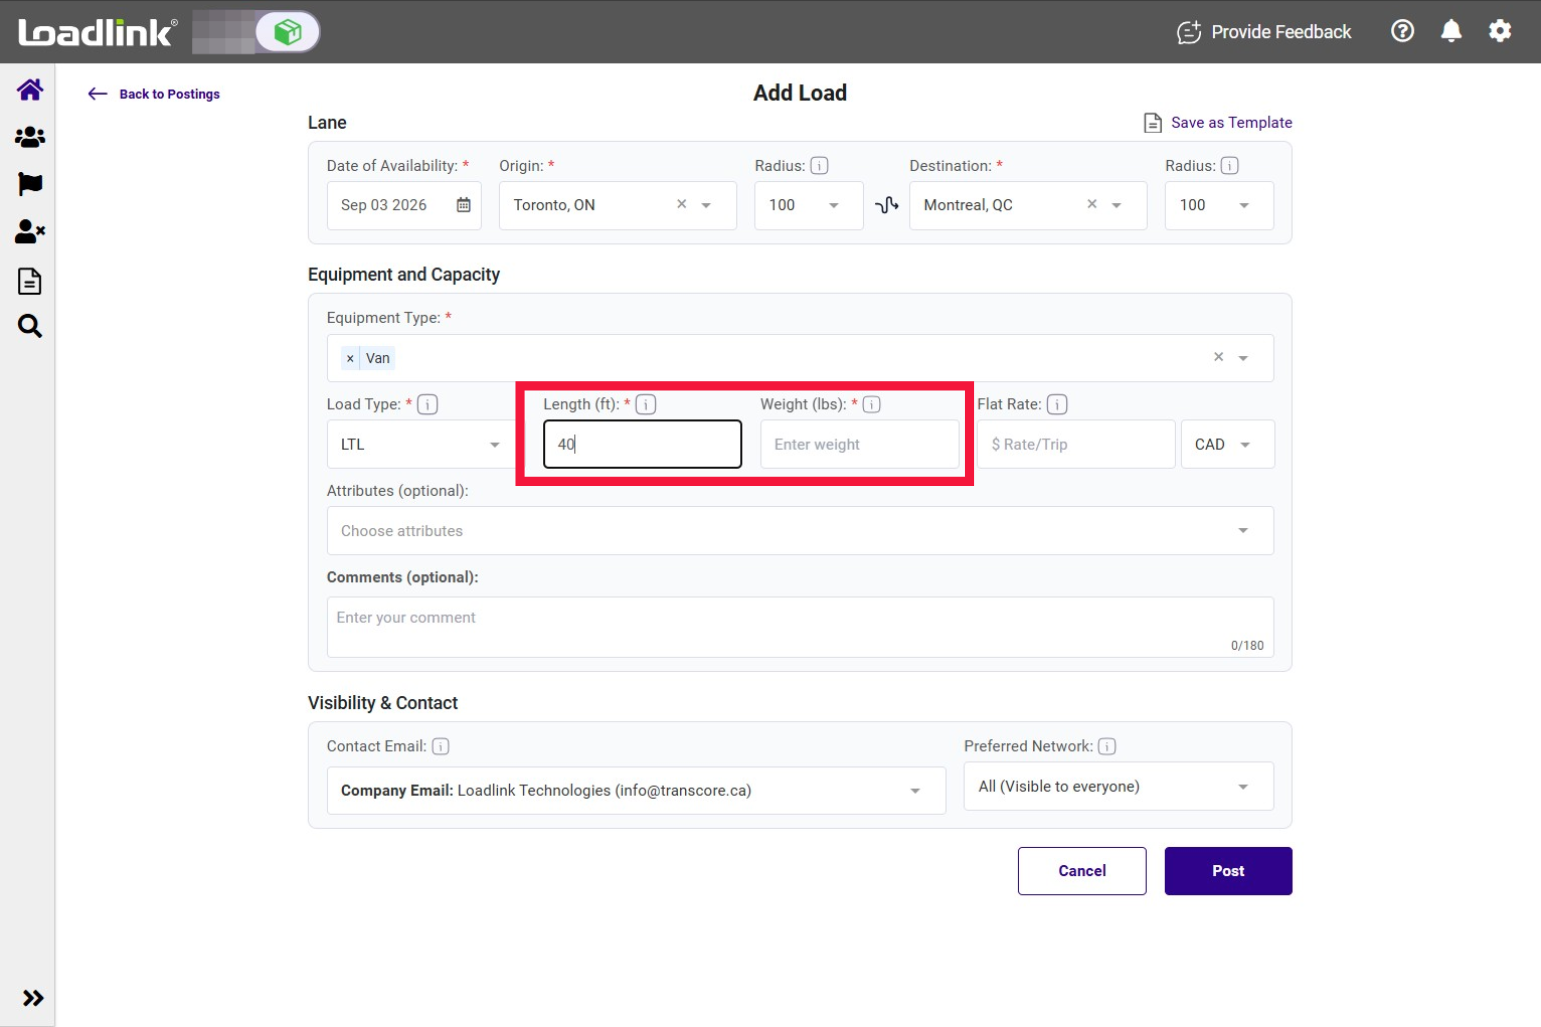
Enter shipment dimensions
Enter your shipment’s length and total weight, using the units shown beside each field.
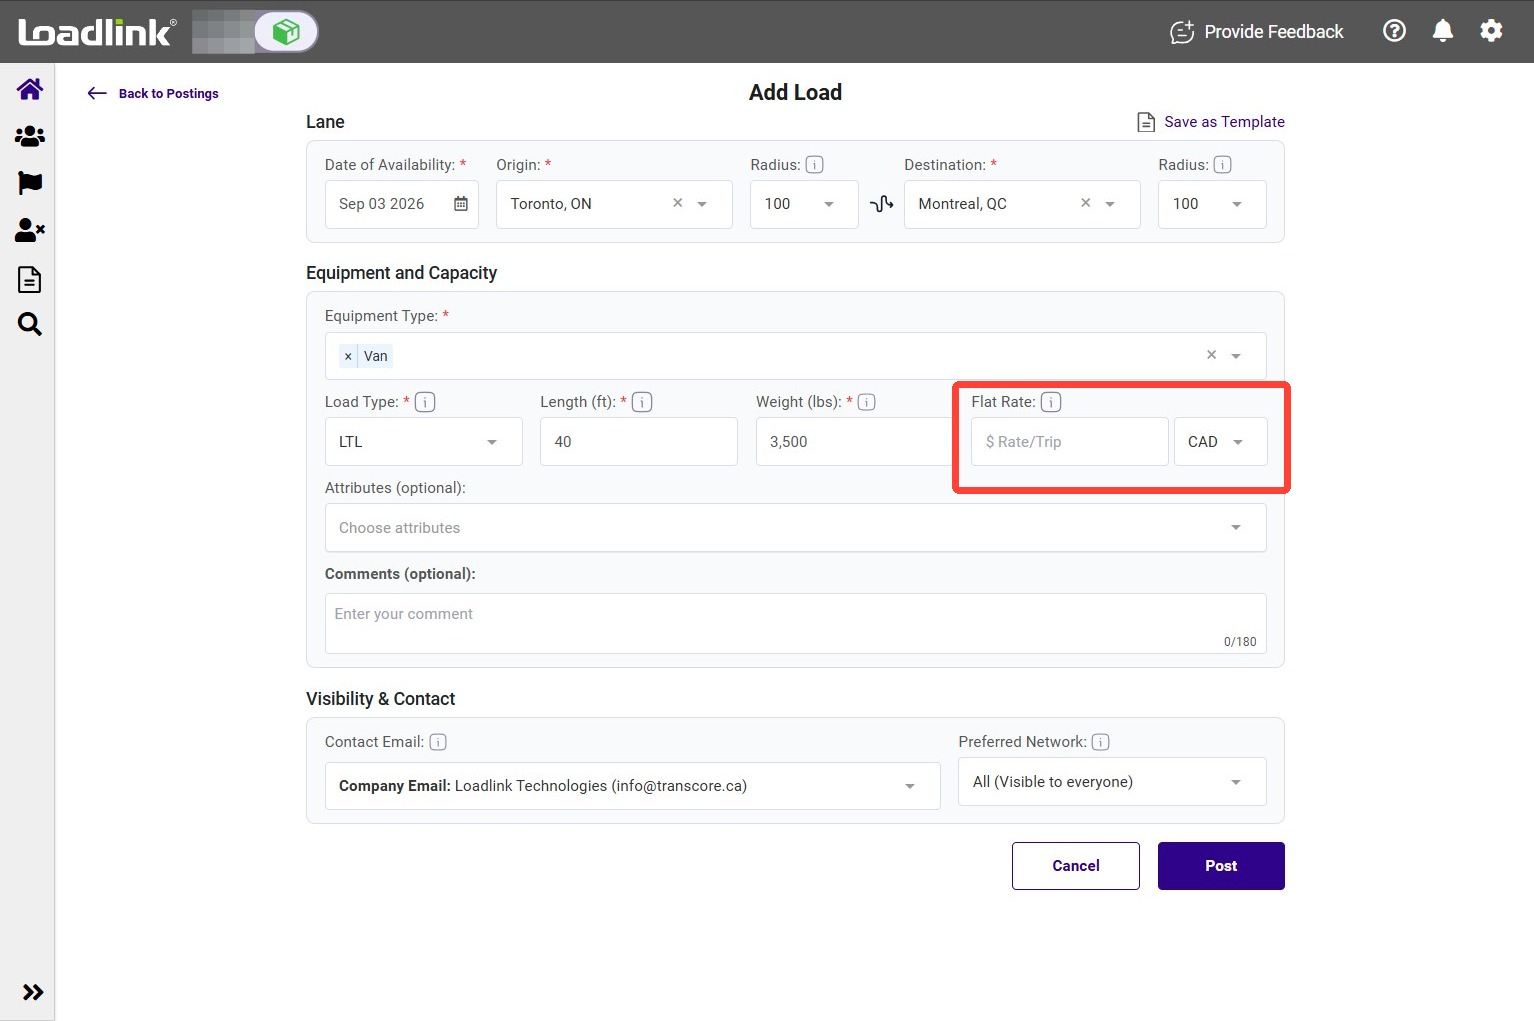
Add a rate (optional)
Enter your offered $ Rate/Mile and select CAD or USD, or leave the field blank.
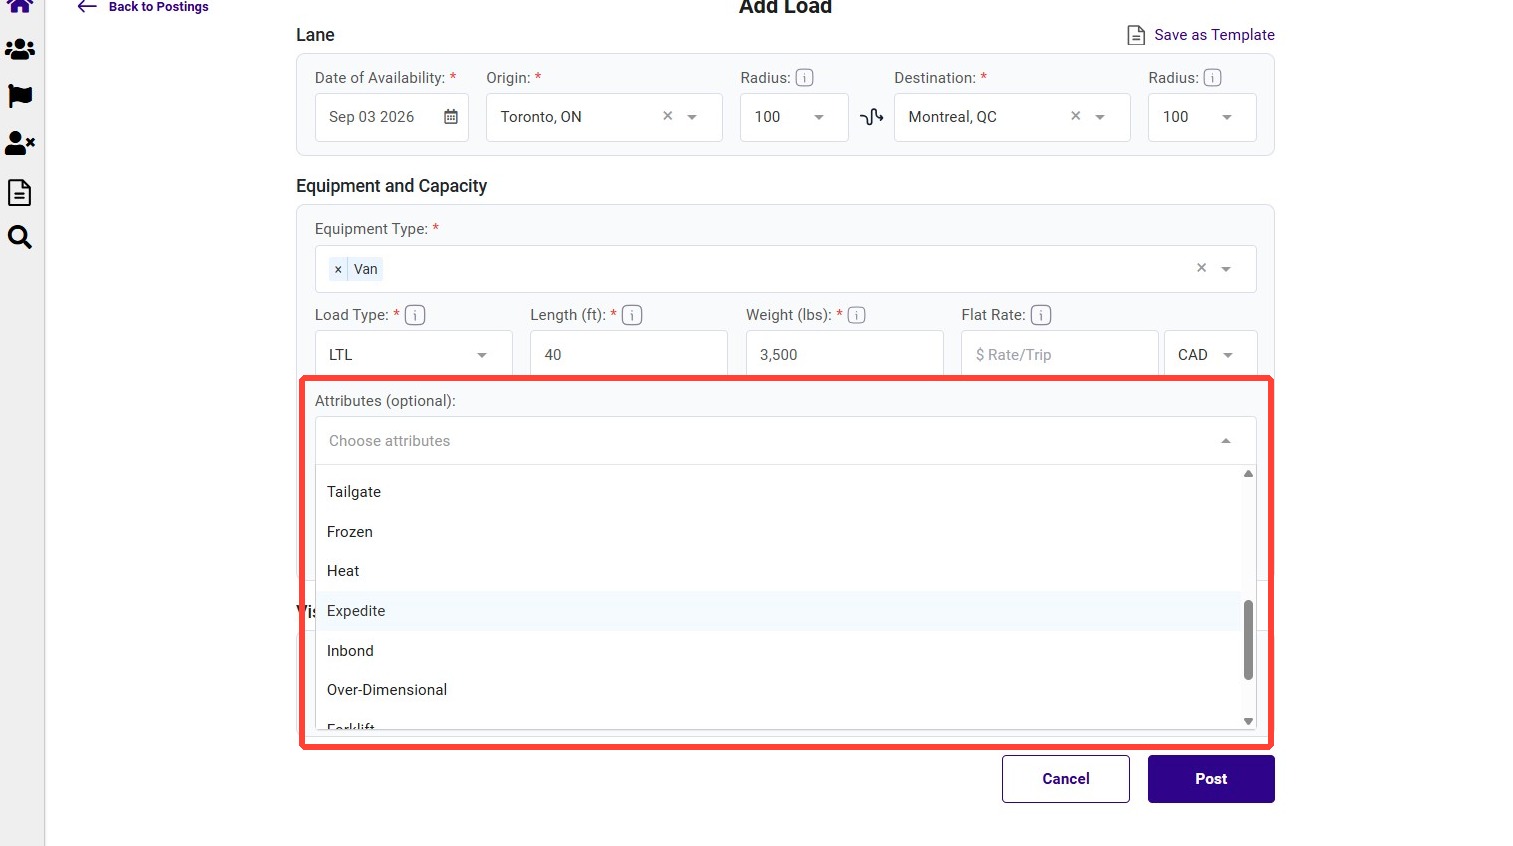
Add load attributes (optional)
Use Attributes to specify additional load details or requirements that carriers should know about.
Add shipment details
– Attributes (optional): Specify additional load details or requirements.
– Comments: Add pickup, delivery, or scheduling instructions.
Choose your contact email
– My email: The email address you use to sign in to Loadlink. – Company email: The company email address assigned to your account.
Note:
Your selection becomes the default for future postings. You can change it at any time.
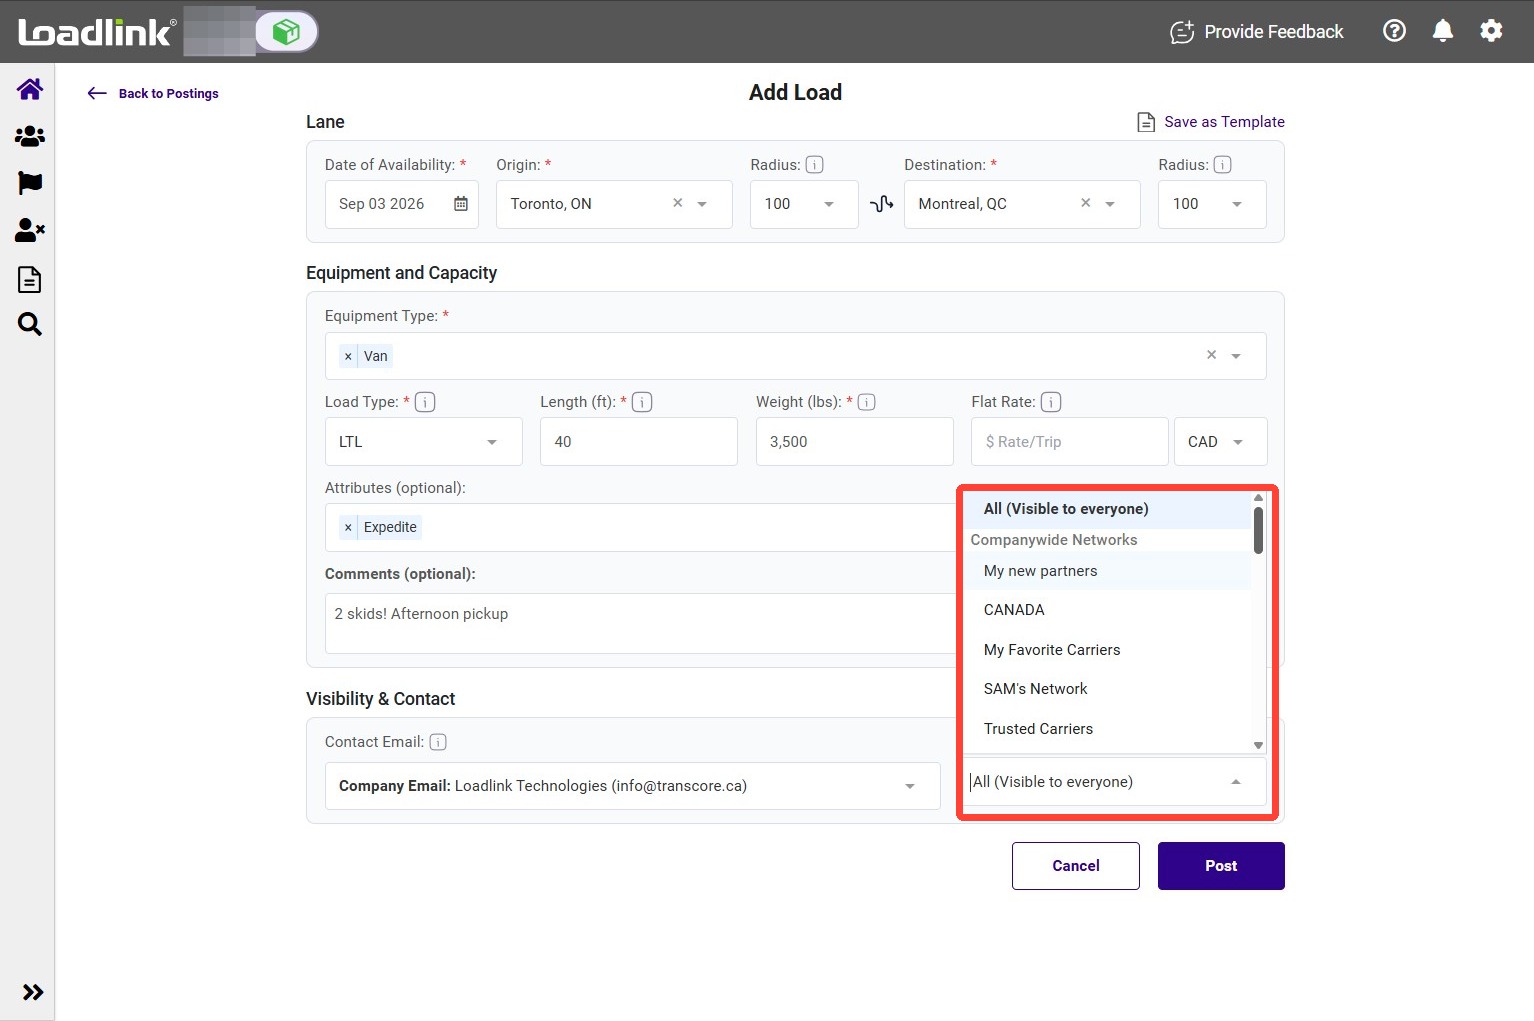
Choose who can view the load
Select All for all eligible members, or select a dedicated network to limit visibility to its members.
Review and publish
Check your load details, contact email, and visibility setting, then click Post.
Your load is now live and visible to your selected audience.