Loadlink Knowledge Base Loadlink Knowledge Base

  • Home
  • Brokers
  • Carriers
  • What’s New
  • loadlink.ca
Home / Updates / May 2026 – Custom Messages In Connected Email

May 2026 – Custom Messages In Connected Email

Loadlink Custom Messages in Connected Email

What's New: Custom Messages in Connected Email

New: write your own email templates. You can now personalize the messages you send to leads through Connected Email, directly inside the Loadlink interface.

Connected Email gave you a fast, verified way to email leads without leaving Loadlink, using a default message we provided. Custom messages build on that. Now you can write your own personalized email template directly inside the Connected Email interface.

Add your tone, your brand keywords, and your own call to action. Use dynamic placeholders like Contact Name, Origin, Destination, and Available Date, and they’ll auto-fill with each posting’s details when you hit send. One template, every lead, personalized automatically.

That means faster outreach without sounding like everyone else.

Read our step-by-step guides below to get started ↓

Test Connected Email
Send Custom Messages on Loadlink
Setup Your Email Signature

Step-by-Step Guides: Custom Connect

How to Configure and Test Your Connected Email in Loadlink

Learn how to link your professional email account to the Loadlink platform for seamless communication. This guide walks you through the authorization process and shows you how to verify your connection by sending a test email.

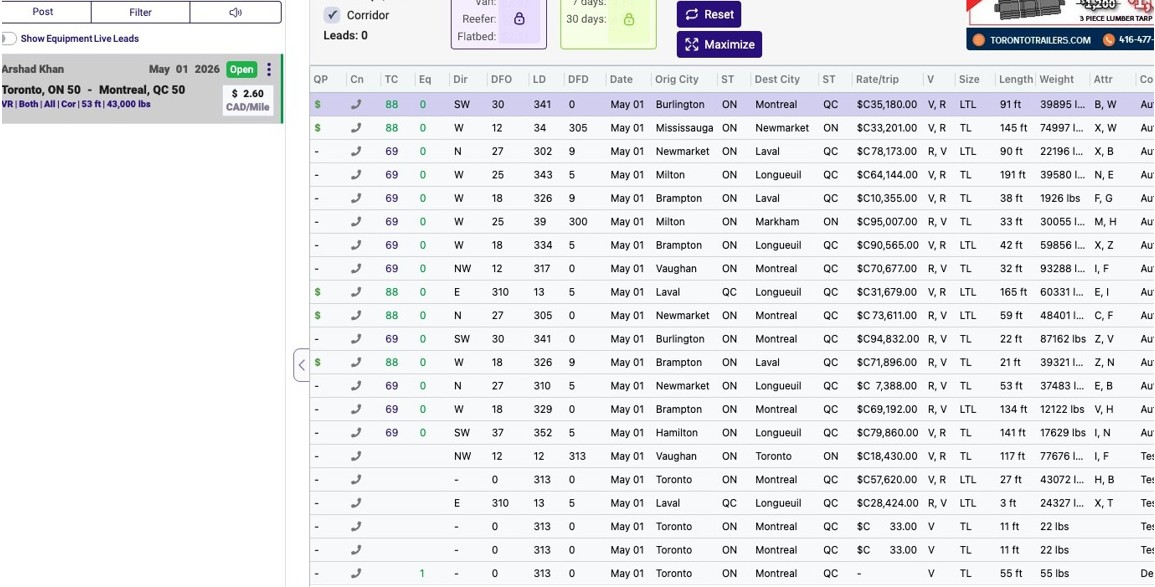
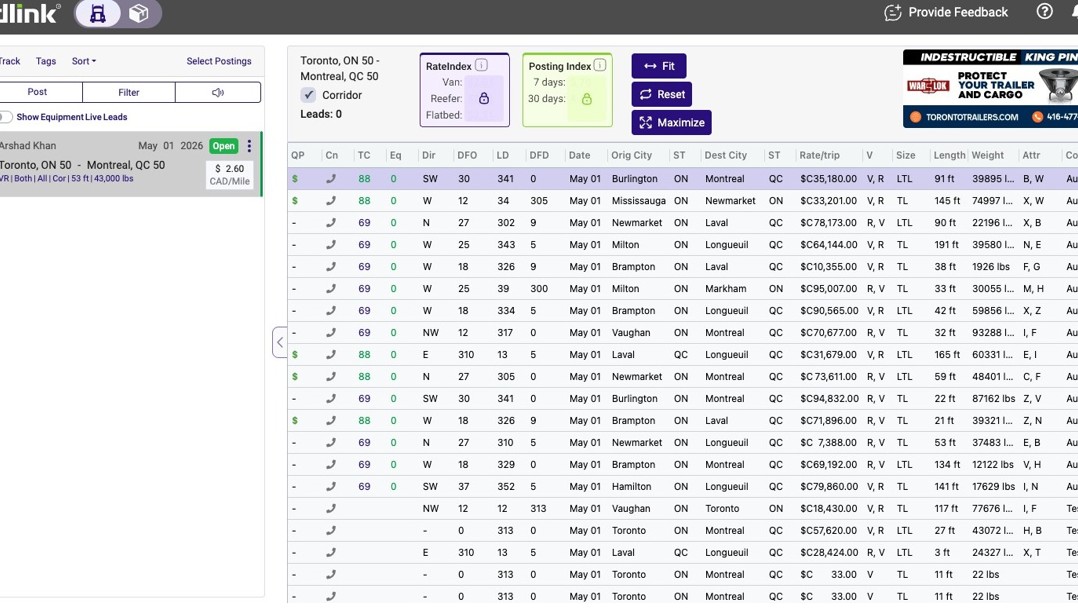
1. Navigate to Loadlink Load Board

1

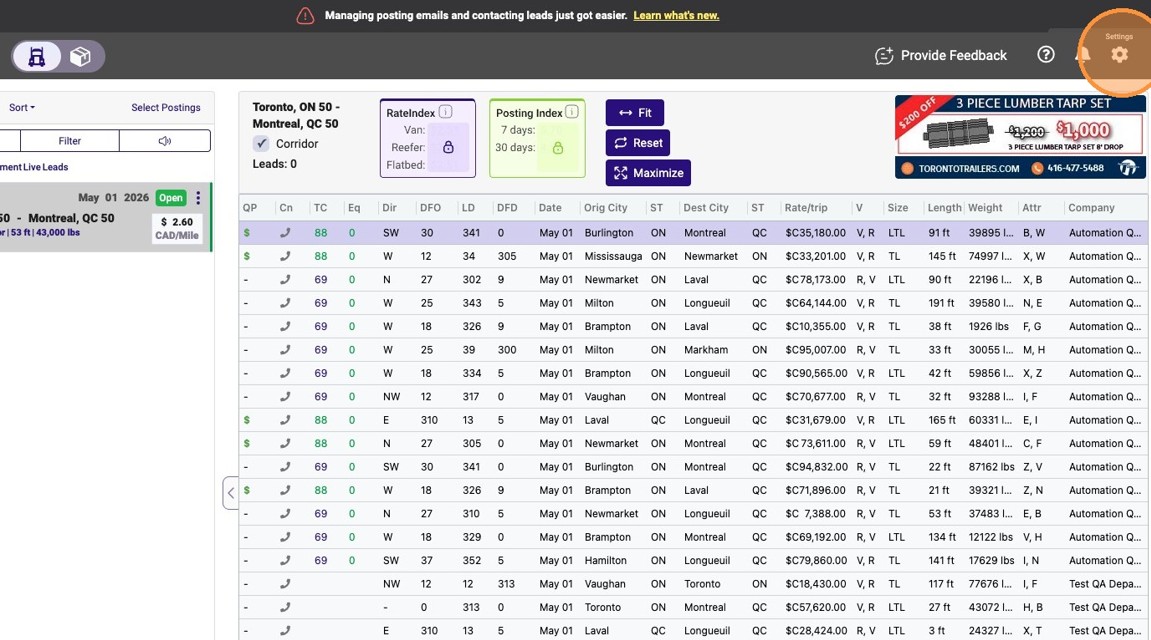
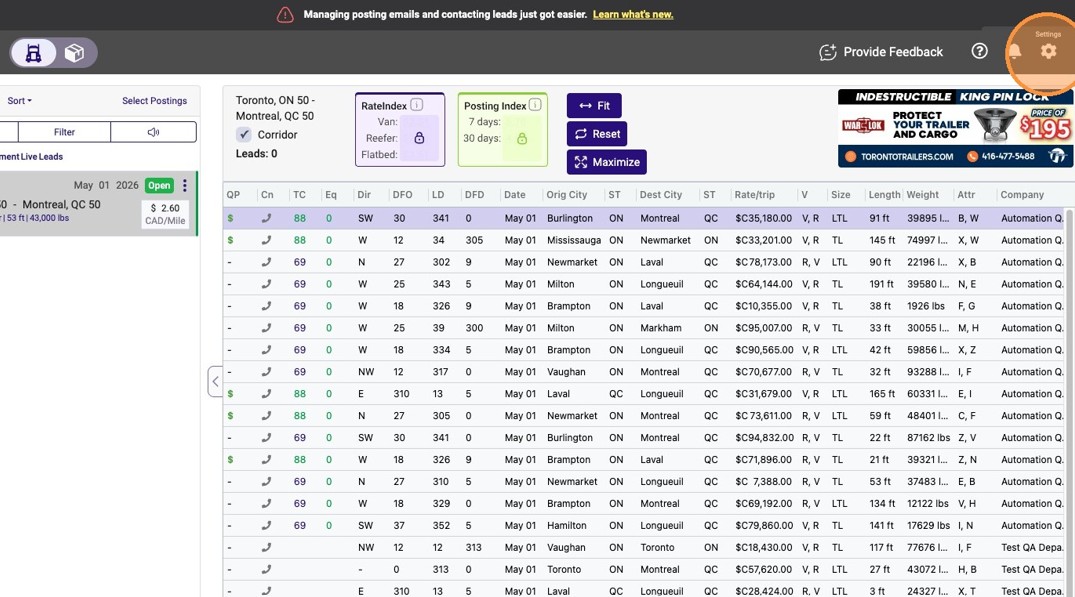
2. Click profile gear icon in the top right corner.

2

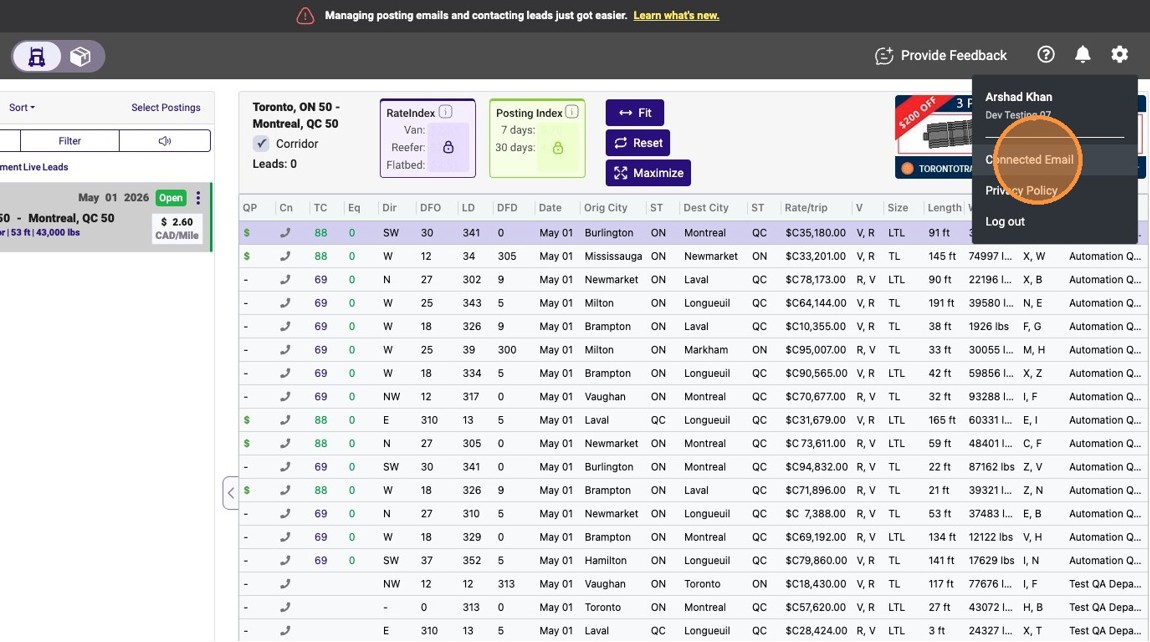
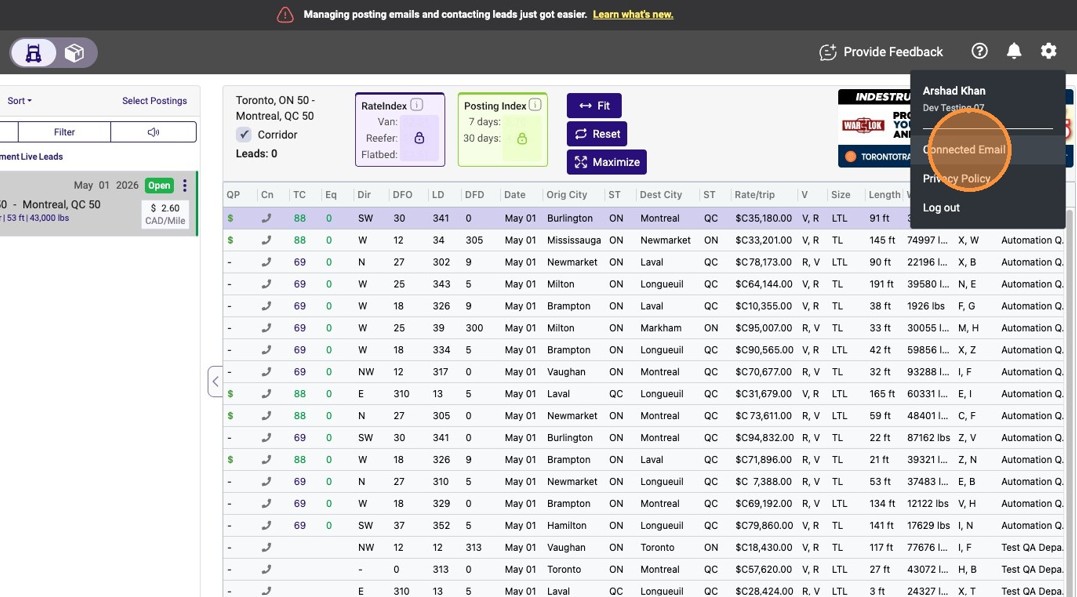
3. Click “Connected Email”

3

Email Configuration

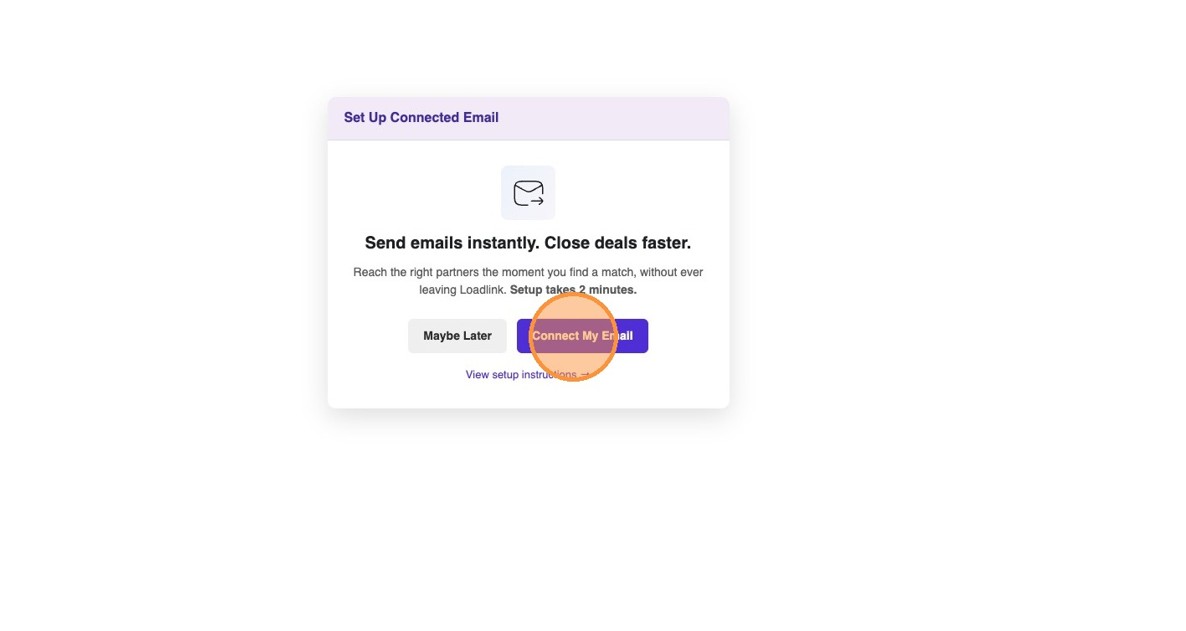
4. Click “Connect My Email”

4

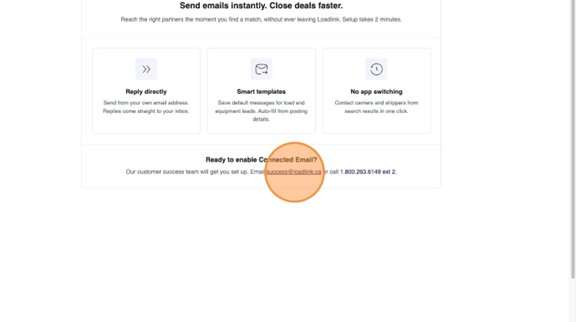
5. Click here.

5

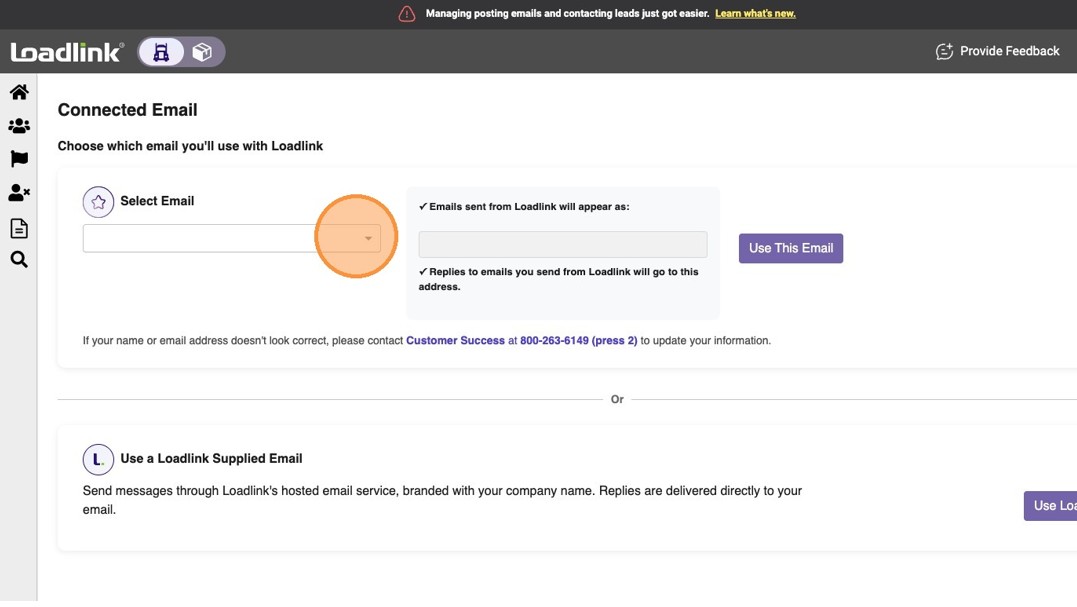
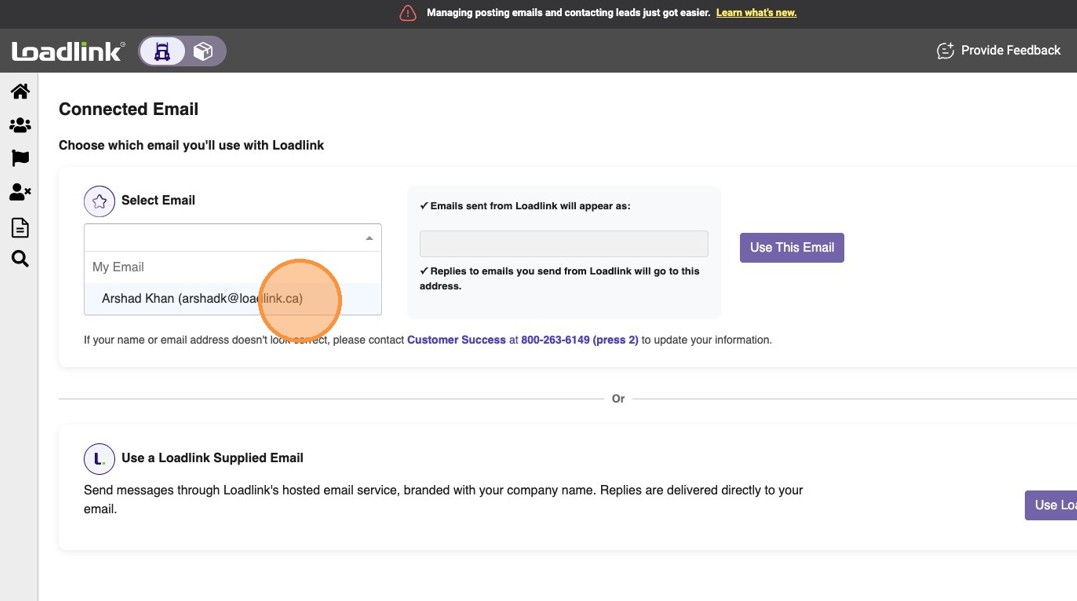
6. Select Email Address from “Select Email” Dropdown.

6

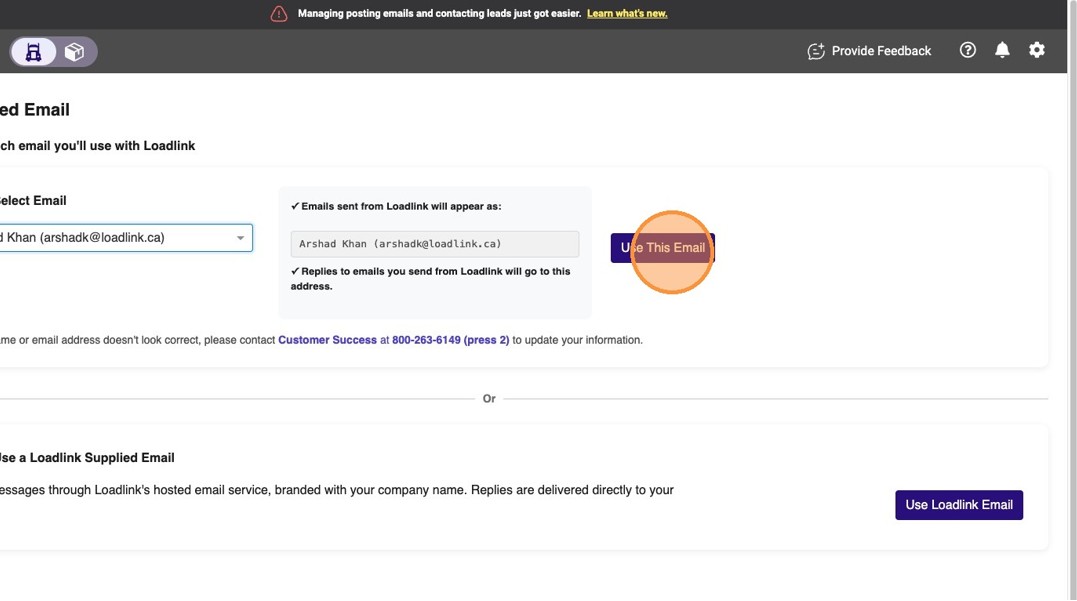
7. Click “Use This Email”

7

External Authentication

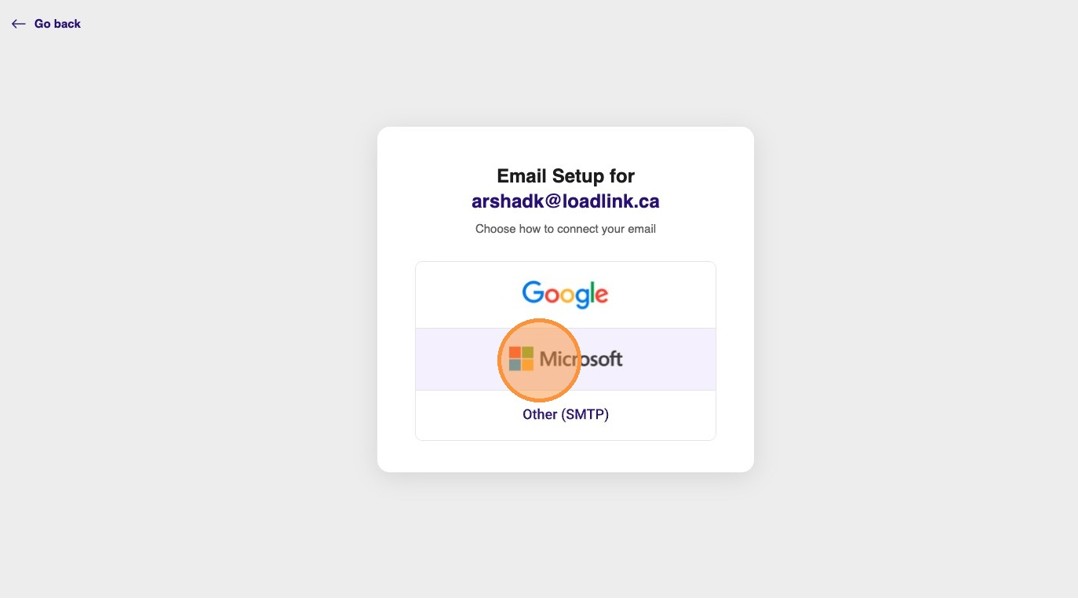
8. Select Email Provider to proceed with email authentication.

8

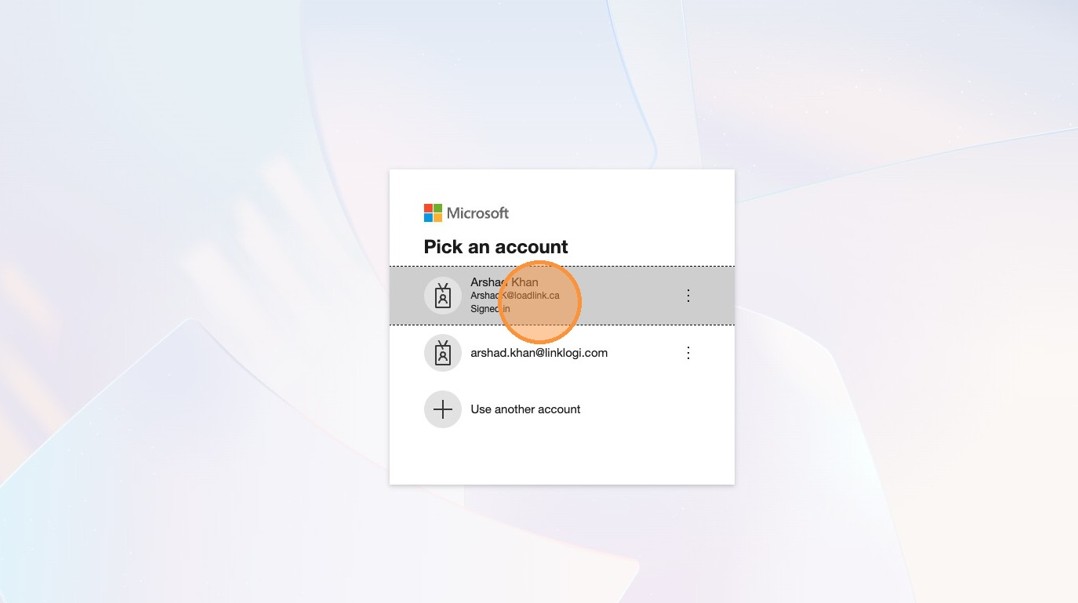
9. Select your account to sign in.

9

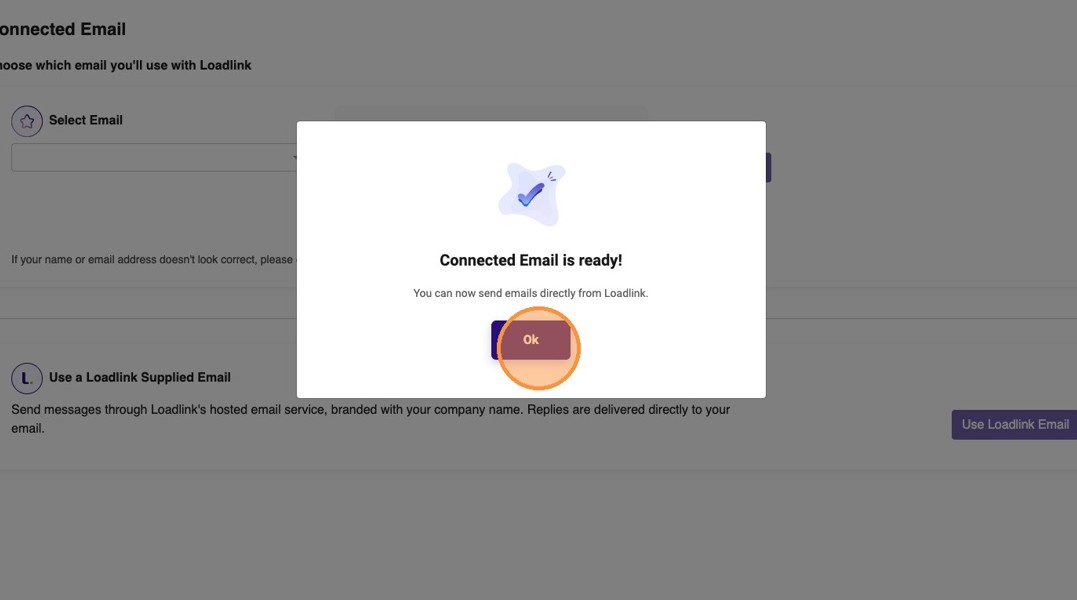
10. Click ‘Ok’ to confirm the email connection is ready.

10

Verification Test

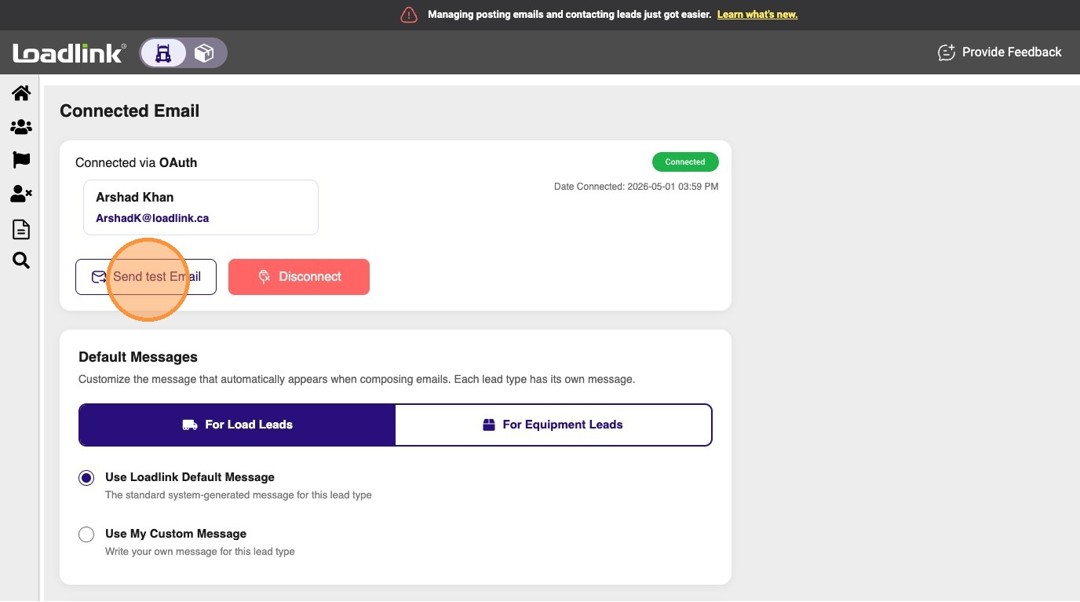
11. Click “Send test Email”

11

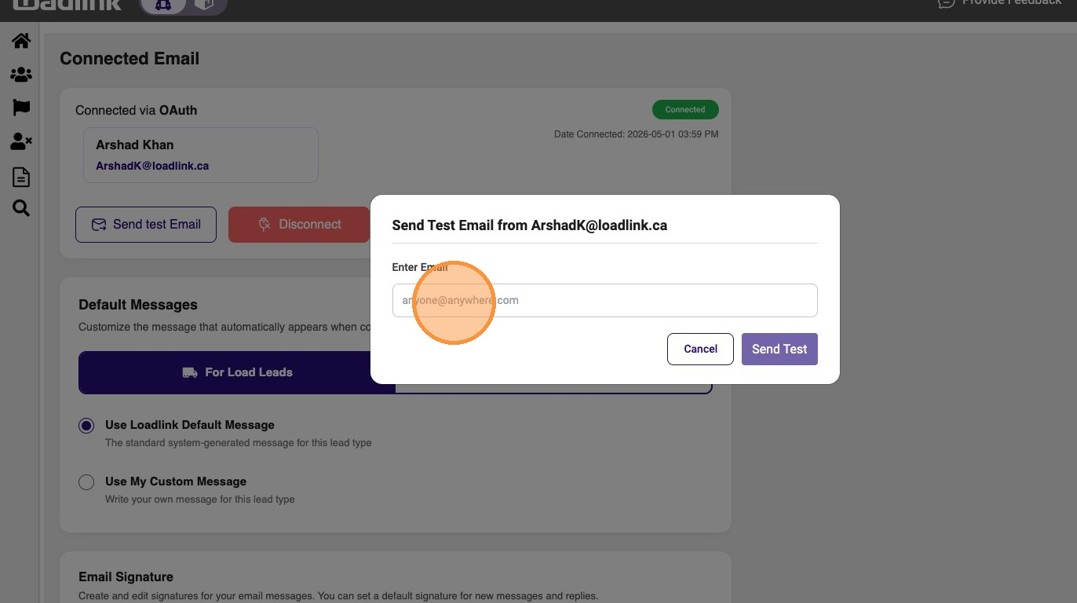
12. Type the recipient’s email address in the Enter Email field.

12

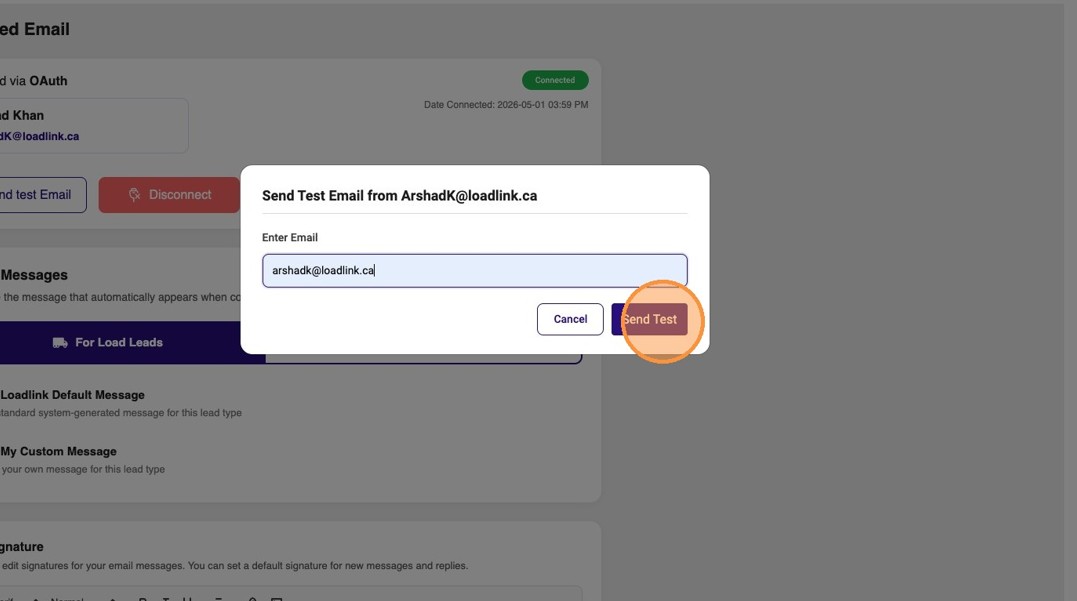
13. Click “Send Test”

13

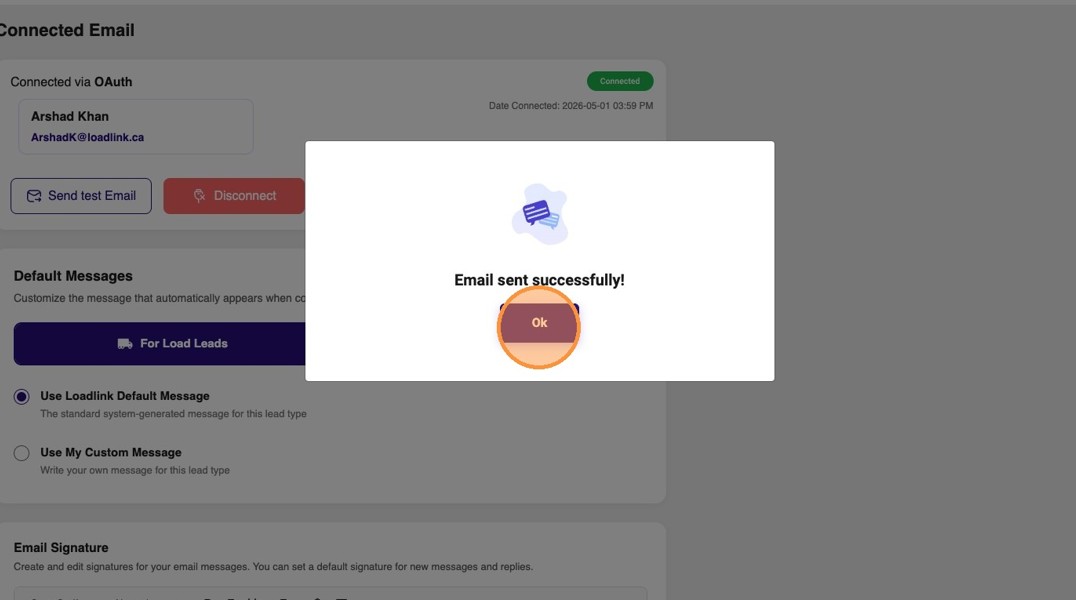
14. Click ‘Ok’ to dismiss the success notification.

14

Return to Top ↑

How to Send Custom Messages on Loadlink

Learn how to personalize and automate your communication by setting up custom message templates on the Loadlink platform. This guide helps you streamline your workflow by saving frequently used text for quick and efficient dispatching.

Lead Dashboard Navigation

1. Login to Loadlink Load Board

1

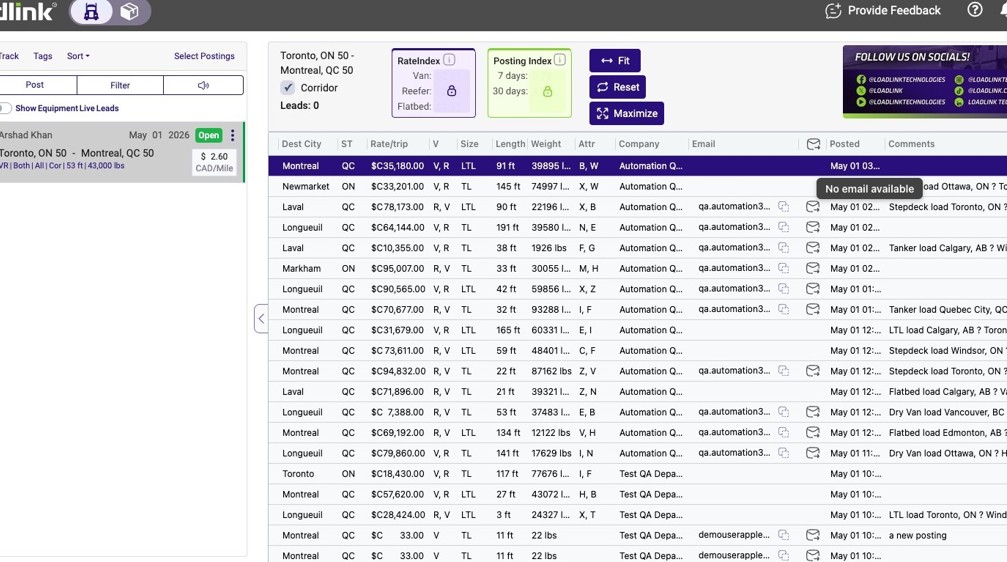
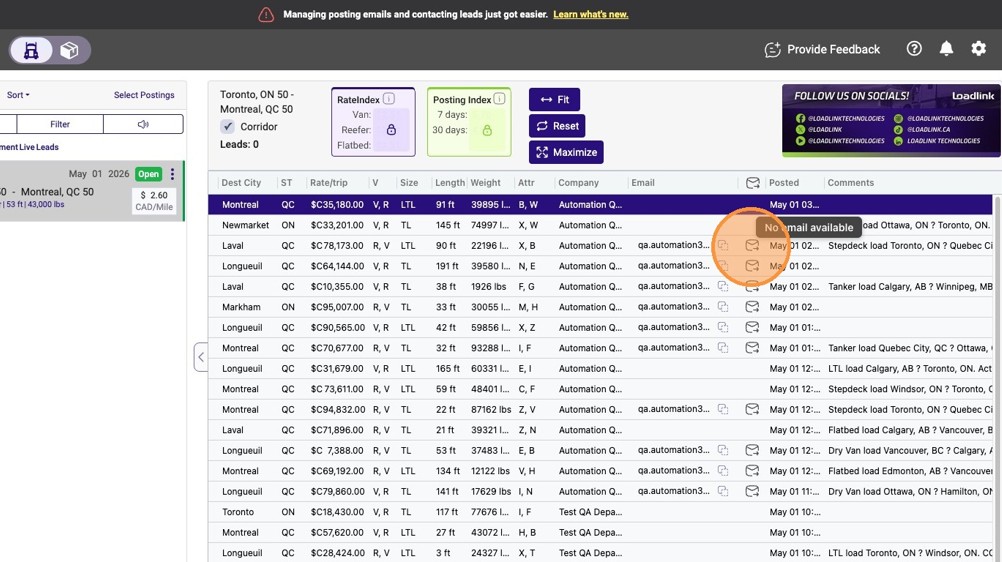
2. Click the envelope icon next to a lead to open the email composer.

2

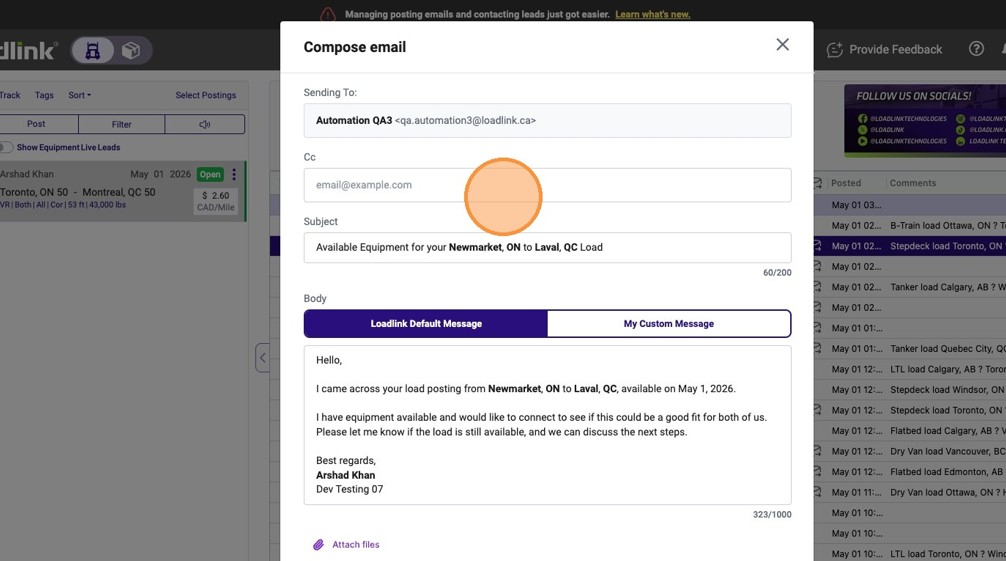
3. Click the “email@example.com” field.

3

4. Click “Connect My Email”

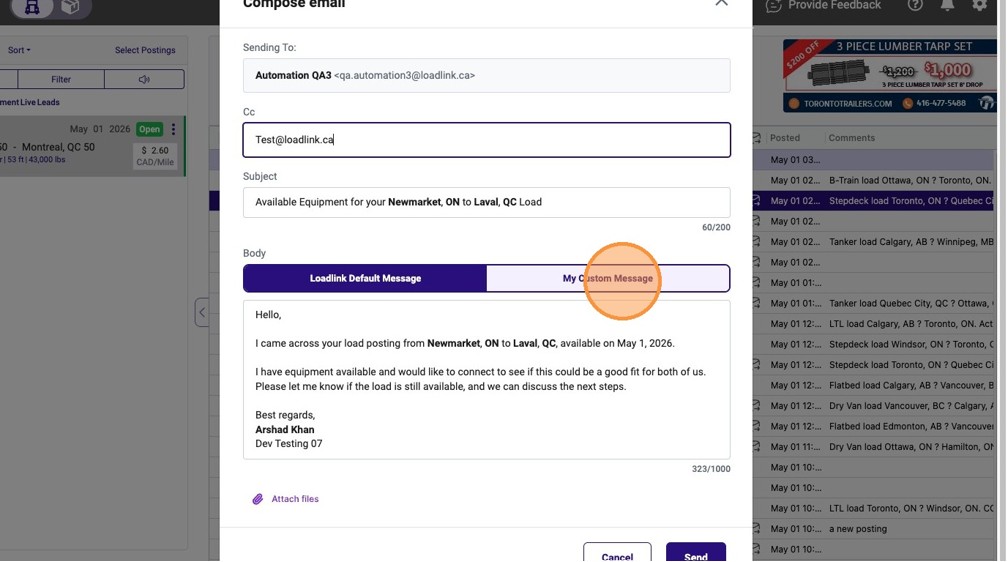
5. Select the My Custom Message tab.

45

5. Click here.

5

Email Template Configuration

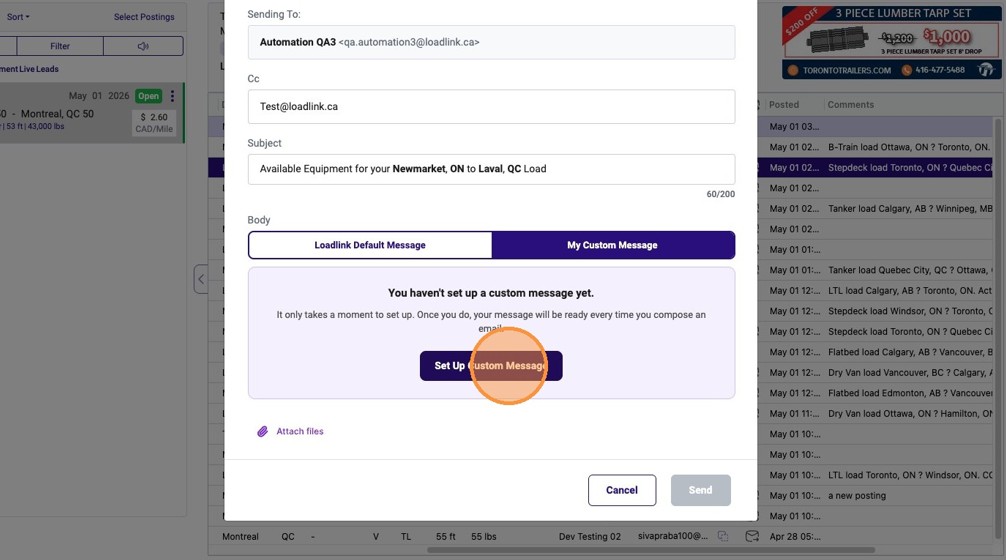
6. Click Set Up Custom Message to begin configuring your email template.

6

7. Navigate to the Email Settings configuration page.

7

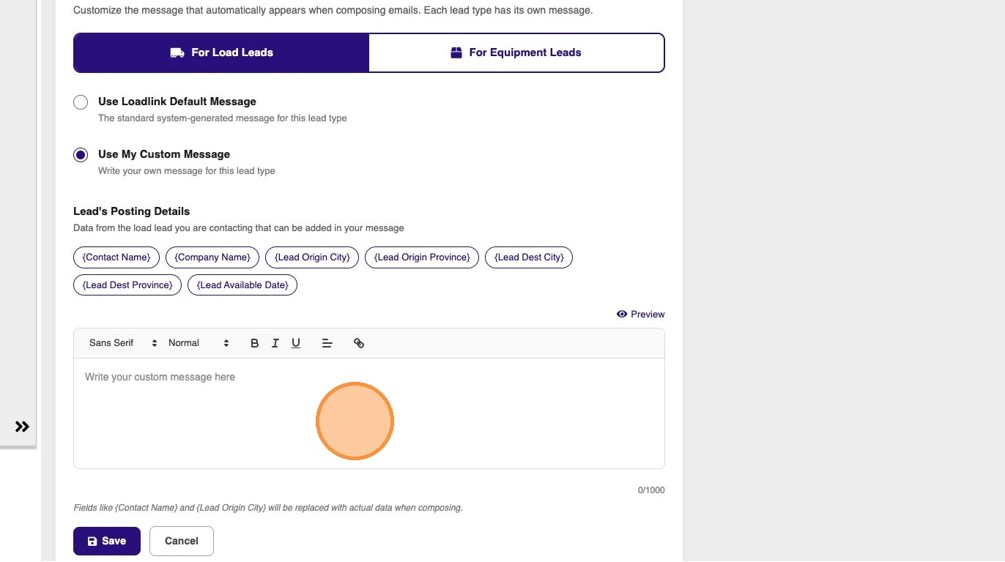
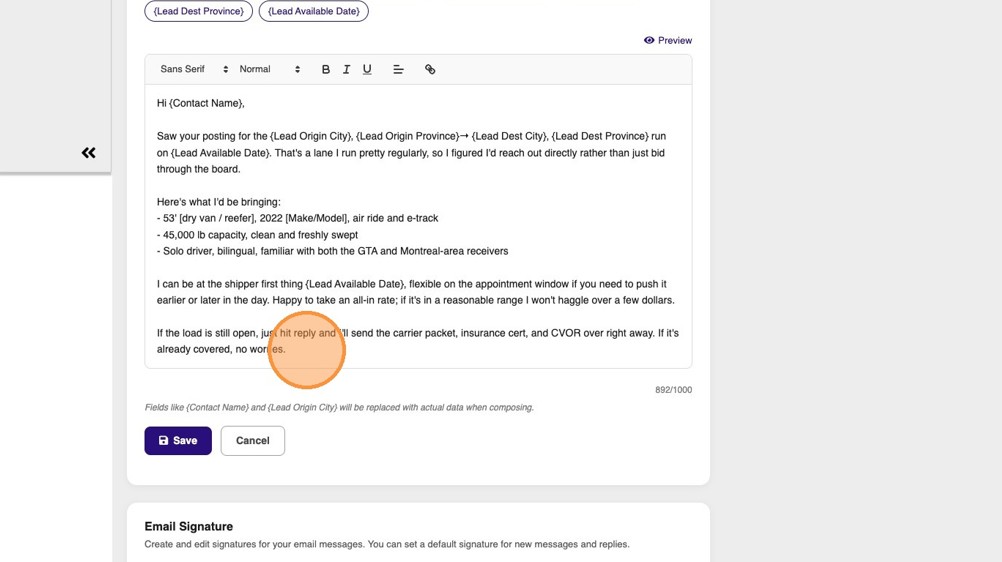
8. Compose your template in the editor below.

The tags at the top of the page act as placeholders. Insert them anywhere you want a dynamic value (Contact Name, Origin City and Province, Destination City and Province, Available Date). Each time you send the message from a posting, the placeholders are replaced with that posting’s actual values.

8

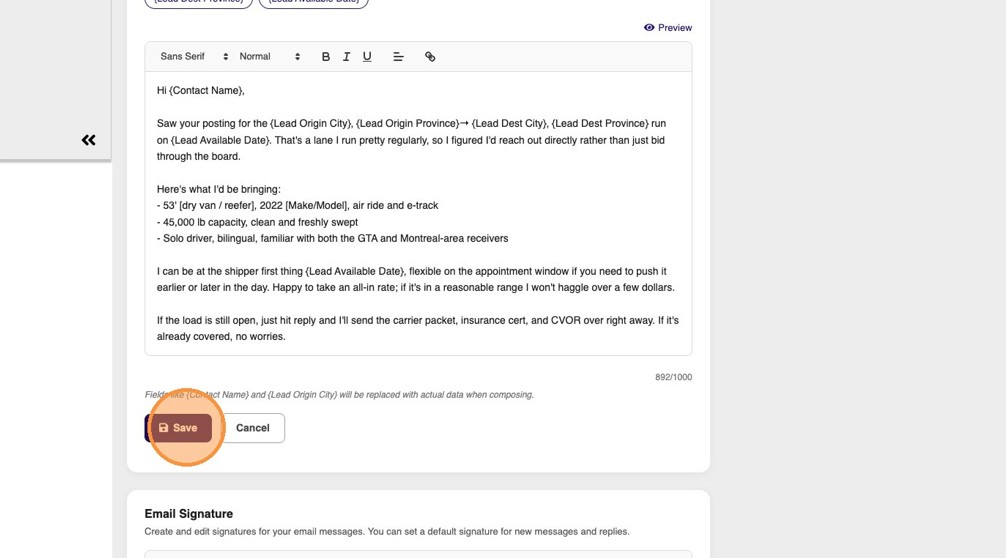
9. Click “Save”

9

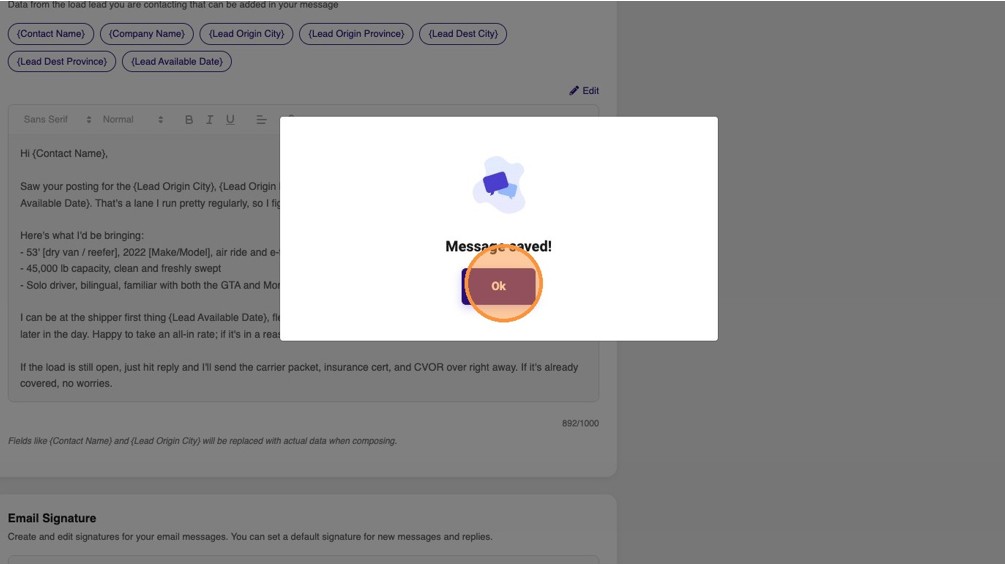
10. Click ‘Ok’

10

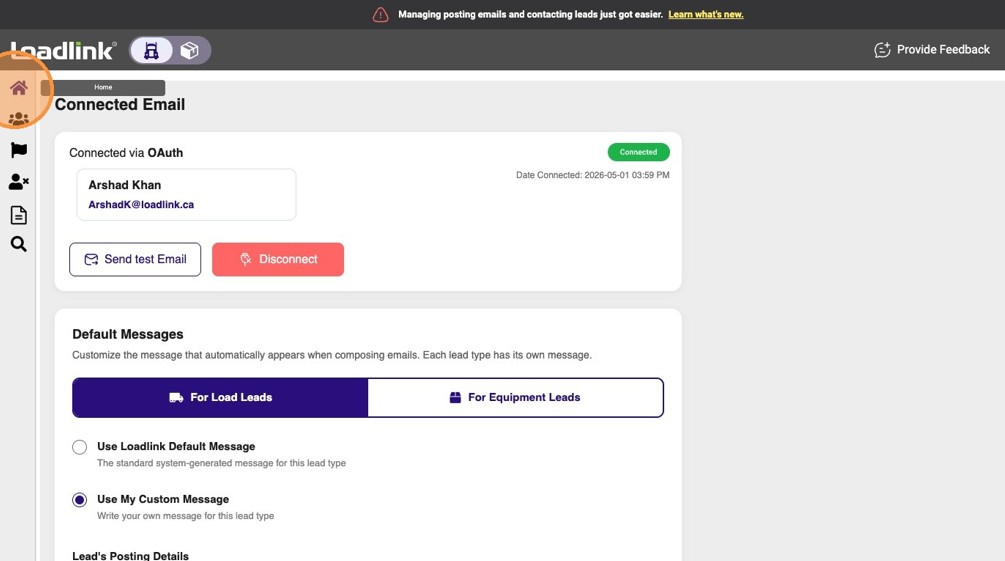
11. Click the Home icon to return to the lead dashboard.

11

Finalizing and Sending

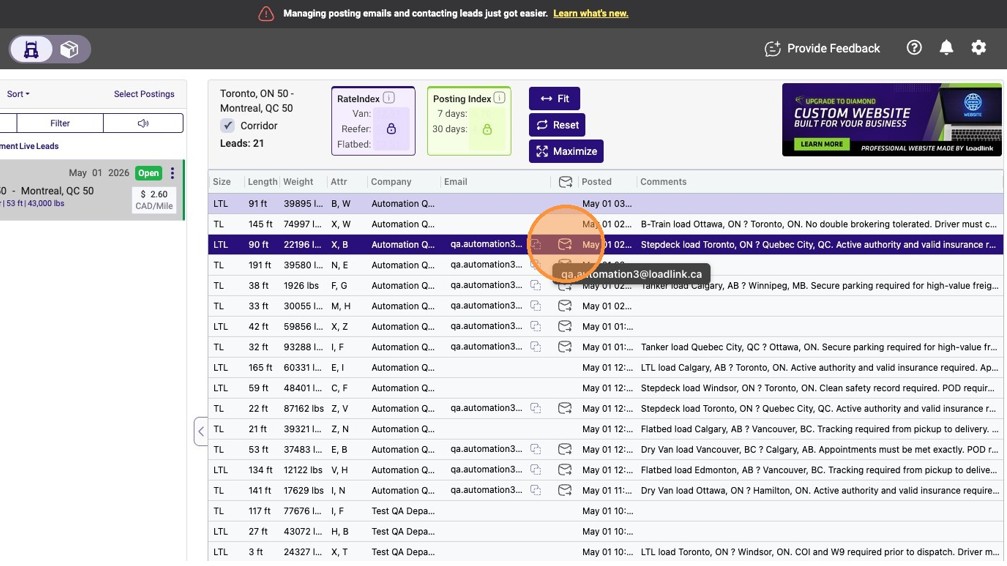
12. Click the email icon for the specific lead you want to contact.

12

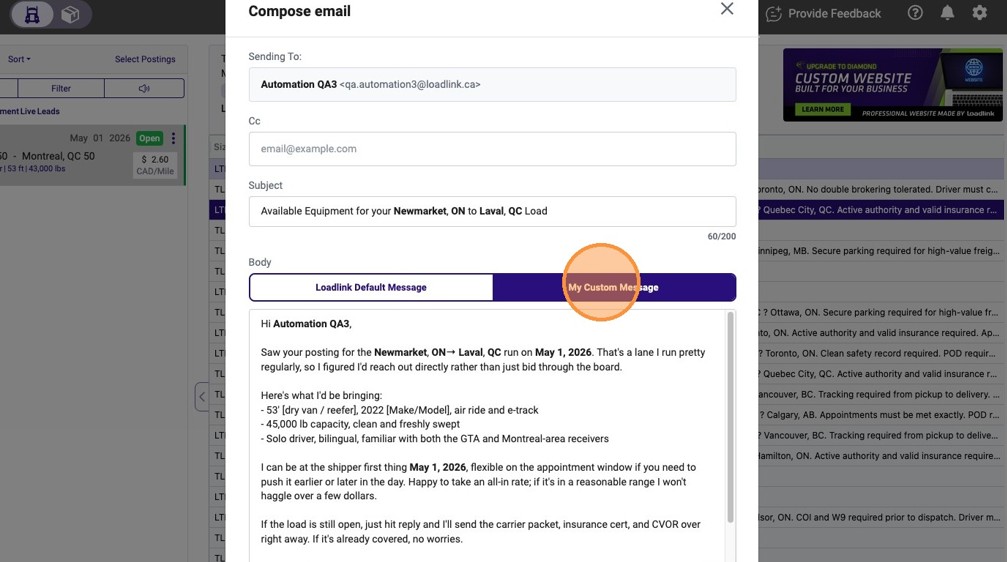
13. Select the My Custom Message option to load your saved template.

13

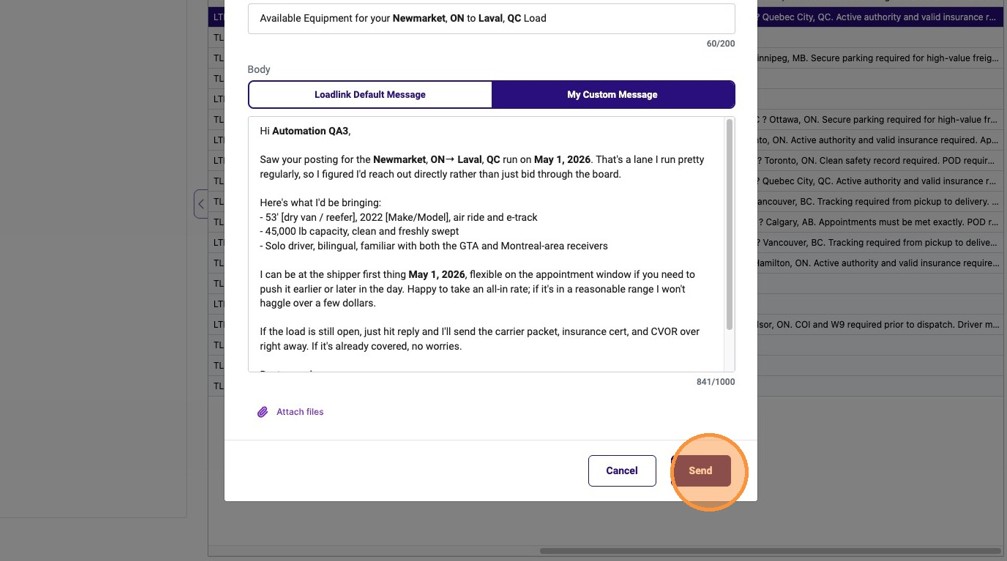
14. Click Send.

14

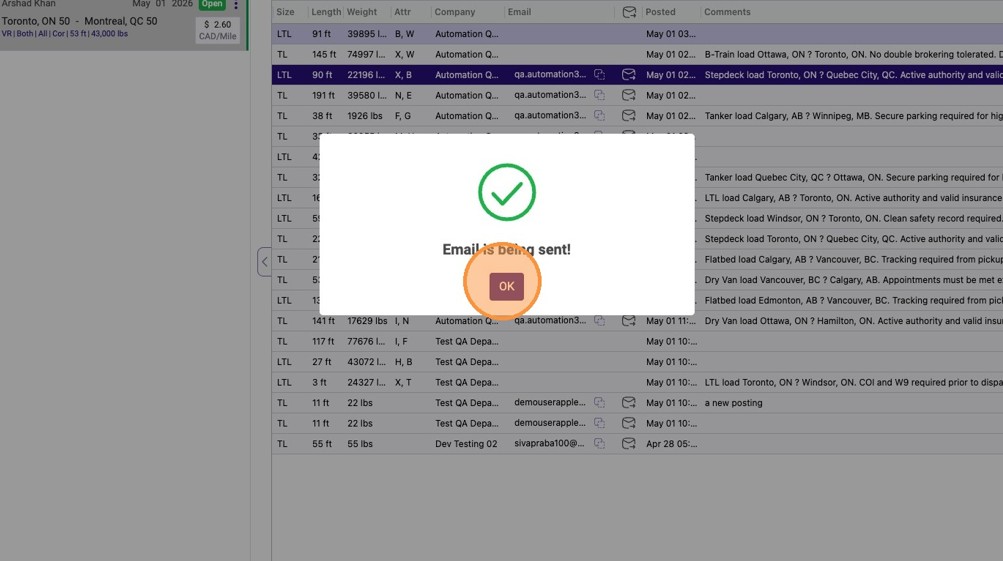
15. Click ‘OK’ to acknowledge that the email is being sent.

15

Return to Top ↑

How to Update Your Loadlink Connected Email Signature

Your email signature appears at the bottom of every message you send through Connected Email. Watch this short video to learn how to update or personalize it directly inside Loadlink.

Return to Top ↑

  • FAQ / Troubleshooting

Q: Can I save more than one custom message?
A: No. You have one custom message that you write once and reuse across every lead. The placeholders handle the per-posting personalization.

Q: Do the placeholders work in the subject line, or only in the body?
A: Placeholders work in the body only. The subject line doesn’t pull in posting details.

Q: What placeholders are available?
A: Contact Name, Origin City and Province, Destination City and Province, and Available Date. Each one is replaced with the actual values from the lead when you send.

Q: Where do replies go?
A: Replies land in your normal email inbox, the one you connected. They don’t stay inside Loadlink.

Q: Will my emails land in spam?
A: Connected Email sends from your own address using standard sender authentication, so deliverability matches what you’d see sending from your normal email client.

Q: Can I have different custom messages for different equipment types or lanes?
A: Not yet. You can save one custom message today. If this would be useful for your operation, let us know at success@loadlink.ca.

Q: Can I still send the default Loadlink message?
A: Yes. The default message is still available alongside your custom message. When you open the email composer for a lead, you’ll see both options and can pick whichever fits the situation.

Q: What happens if I leave a placeholder in the message, but the posting doesn’t have that field filled in?
A: This won’t happen in practice. The placeholder fields are all mandatory on every posting, so there’s no situation where a lead reaches you with one of them blank. Your custom message will always send with every placeholder filled in.

Q: Can I edit my custom message after I save it?
A: Yes. Go back to the gear icon, open Connected Email, and update your message. Changes apply to the next email you send.

Q: Do I need to set up Connected Email before I can use a custom message?
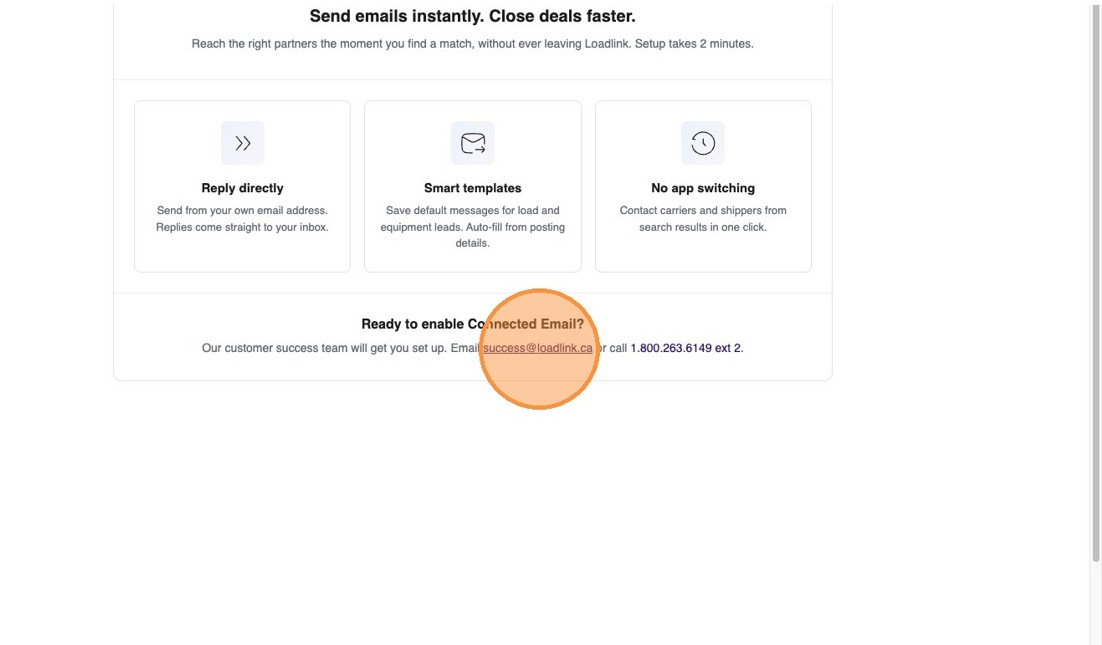
A: Yes. If you don’t see Connected Email under the gear icon, email success@loadlink.ca or call 1.800.253.6149 to have it enabled.

Q: Why can’t I complete Connected Email setup on a Microsoft-managed domain?
A: This error occurs when a user attempts to connect a Microsoft email account but administrator approval is required. The message will look similar to the following:

✅ Correct Flow

Administrator Steps

1. Open the Connected Email Authorization URL:

Connected Email Authorization URL

2. Your administrator needs to complete the authorization process to grant Loadlink access to the Connected Email service:

• Click the link provided above
• Fill out your administrator username & password

• Approve sign-in request

• On the following screen, check off “Consent on behalf of your organization” and click “Accept”

Step 3 Outline

User Steps
1. Log back into Loadlink
2. Select Connected Email from the left navigation
3. Connect the email using the Microsoft OAuth connection option

Once your administrator has allowed permissions to Connected Email, you should be able to successfully connect to Connected Email.

Looking for something that used to live in portal.loadlink.ca? Everything has moved into the Load Board.

See Where It Went
Updates

Article Categories

  • 3Broker Load Board
  • 4Carrier Load Board
  • 1Loadlink Security Agent
  • 3Updates

Subscription Agreement

 Accessibility 

 Privacy 

Loadlink Technologies © Copyright 2025 - All rights reserved. All trademarks are the property of respective owners.